A concrete pump is on site. The crew is ready. The driver asks where to wash out, and that’s when a bad waste plan shows itself.
The container is too small, in the wrong spot, or worse, it’s a standard dumpster that looked big enough on paper but isn’t suited to slurry and dense material. Work slows down fast. Cleanup gets messy. Someone starts calling the hauler, the superintendent, and the office at the same time.
That’s why construction dumpster dimensions can’t be treated like a minor rental detail. The outside measurements matter because they affect placement, truck access, and how close you can keep debris management to the work. The interior capacity matters because it controls how much volume you can contain. But on concrete and demolition work, weight becomes the spec that decides whether your plan works at all.
Most new project leads know the standard yard sizes. Fewer understand how quickly dense debris changes the decision. A container that handles framing scrap and mixed renovation debris may be the wrong choice for brick, dirt, or concrete. That mistake shows up as refused pickups, overloaded boxes, schedule disruption, and extra handling.
Good dumpster planning is simple when you approach it in the right order. Start with dimensions. Check the material. Verify the weight limit. Then confirm the drop zone works for the truck that has to place and remove it. That’s the discipline that keeps a site moving and avoids expensive corrections after debris starts piling up.
Introduction Getting Dumpster Dimensions Right
Most jobsite waste problems don’t start with hauling. They start with assumptions.
A project lead orders “a 20-yard dumpster” and thinks the job is covered. Then the crew starts loading concrete chunks, washout residue, masonry, or soaked debris. The container still has empty air space, but the limit isn’t volume anymore. It’s weight, handling, and whether the hauler will even take it.
That’s where people get burned. They focus on the box size and miss the operating reality.
Practical rule: If the material is dense, don’t ask only how much space it takes. Ask how much it weighs when it leaves the site.
Dumpster sizing works best when you treat it like a site logistics decision, not a trash decision. The box has to fit the work, fit the access path, and fit the load profile. On a remodel, that might mean matching a roll-off to drywall, framing offcuts, and packaging. On concrete work, it means recognizing early that standard dumpster advice often leaves out the hardest part: heavy material reaches load limits long before containers look full.
That’s also why field teams need to separate two ideas that get blended together all the time:
- Exterior dimensions determine where the container can sit.
- Cubic yard capacity tells you how much volume it can hold.
- Load rating decides whether the material can be hauled legally and economically.
When you get those three aligned, debris handling stays routine. When you don’t, waste control starts driving the schedule. No superintendent wants that.
Standard Construction Dumpster Dimensions Quick Reference
Roll-off containers are measured in cubic yards. One cubic yard equals 27 cubic feet, or a 3 x 3 x 3 foot space, according to this roll-off dumpster size guide.
That yard rating tells you capacity, not exact outside dimensions. Exterior measurements vary a bit by hauler, but the standard sizes are consistent enough to plan around.
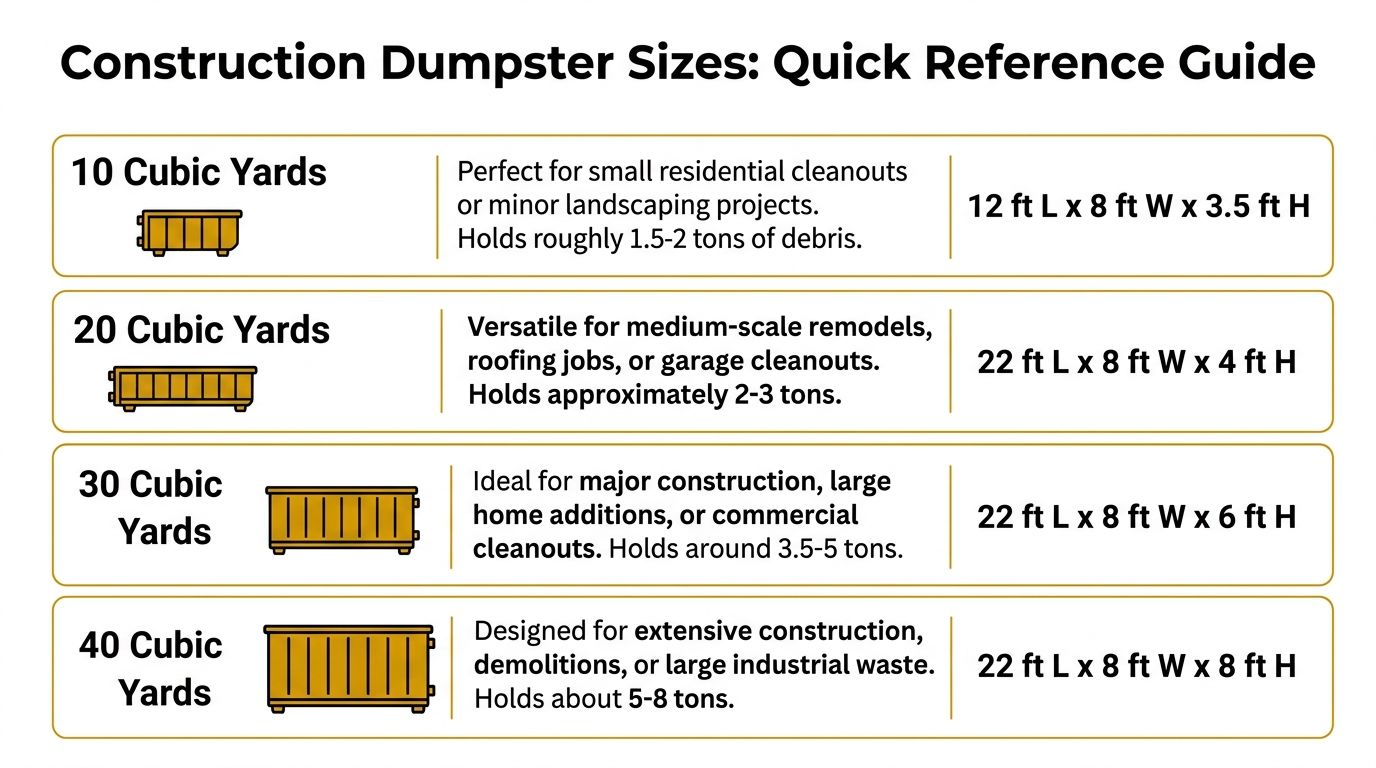
Common roll off sizes
| Dumpster size | Typical dimensions | Typical pickup load equivalent | Common fit |
|---|---|---|---|
| 10 yard | 14' L x 7.5' W x 3.5' H | 3 to 4 pickup loads | Small remodels, tight-site cleanouts, heavy debris in controlled quantities |
| 20 yard | 22' L x 7.5' W x 4.5' H | About 8 pickup loads | Mid-size renovation, roofing, general construction debris |
| 30 yard | 22' L x 8' W x 6' H | 9 to 15 pickup loads | Major renovation, whole-home work, larger build phases |
| 40 yard | 22' L x 7.5' W x 8' H | About 16 pickup loads | Major demolition, commercial cleanouts, large-volume debris |
How to use the chart in the field
The quick shortcut is to think in two layers.
First, ask whether the footprint fits your site. A 10-yard box is shorter and easier to place in constrained spaces. A 20, 30, or 40-yard box usually takes the same general width but more staging discipline because of overall length and the truck maneuvering required.
Second, ask whether the project type fits the size range. Standard guidance is straightforward:
- Light remodels usually fit smaller bins.
- Standard renovations commonly use mid-size containers.
- Heavy-duty demolition often pushes toward a larger container.
That framework works well for mixed debris. It works less well when the material is unusually dense. That’s the point where the chart stops being enough on its own.
Converting Dumpster Volume to Material Weight
A lot of crews still talk about dumpsters as if volume tells the whole story. It doesn’t.
A container can be physically large enough for the debris and still be the wrong choice because the material is too dense. That’s the trap with brick, dirt, roofing tear-off, and especially concrete. Empty space doesn’t matter if the load rating is already spent.
Volume tells you space
A 20-yard dumpster holds 6 to 10 pickup truck loads, while a 40-yard dumpster holds 12 to 20 pickup truck loads, based on this construction dumpster sizing overview. That’s useful because crews understand pickup-load comparisons quickly.
If the job is mostly:
- wood
- drywall
- insulation
- packaging
- mixed light renovation debris
then volume is a practical first filter. You’re mostly solving for how many trips you want to avoid and how often the site needs to be cleaned out.
Weight tells you what can leave the site
Dense material changes the math. The same 20-yard box that feels roomy for a renovation can become a bad choice for concrete, brick, or similar heavy debris because those materials consume weight capacity fast.
A half-full dumpster can still be overloaded. That’s common with dense demolition waste.
This is the right mental model for a new project lead:
- Use cubic yards to estimate how much physical debris you have.
- Use material type to judge whether the load will be light, moderate, or heavy.
- Verify the hauler’s load rating before anyone starts filling the container.
The mistake is loading by eye. Crews see sidewall height, not axle limits. Haulers and inspectors don’t care how much room was left in the box. They care whether the load can be hauled safely and accepted at pickup.
That shift in thinking is what separates a clean debris plan from one that turns into rework.
Understanding Critical Load and Weight Limits
The biggest mistake in dumpster planning is treating cubic yards as the only limit.
For general construction debris, that shortcut sometimes works. For concrete, it doesn’t. A box can look underfilled and still be too heavy to move without fees, delays, or rejection.
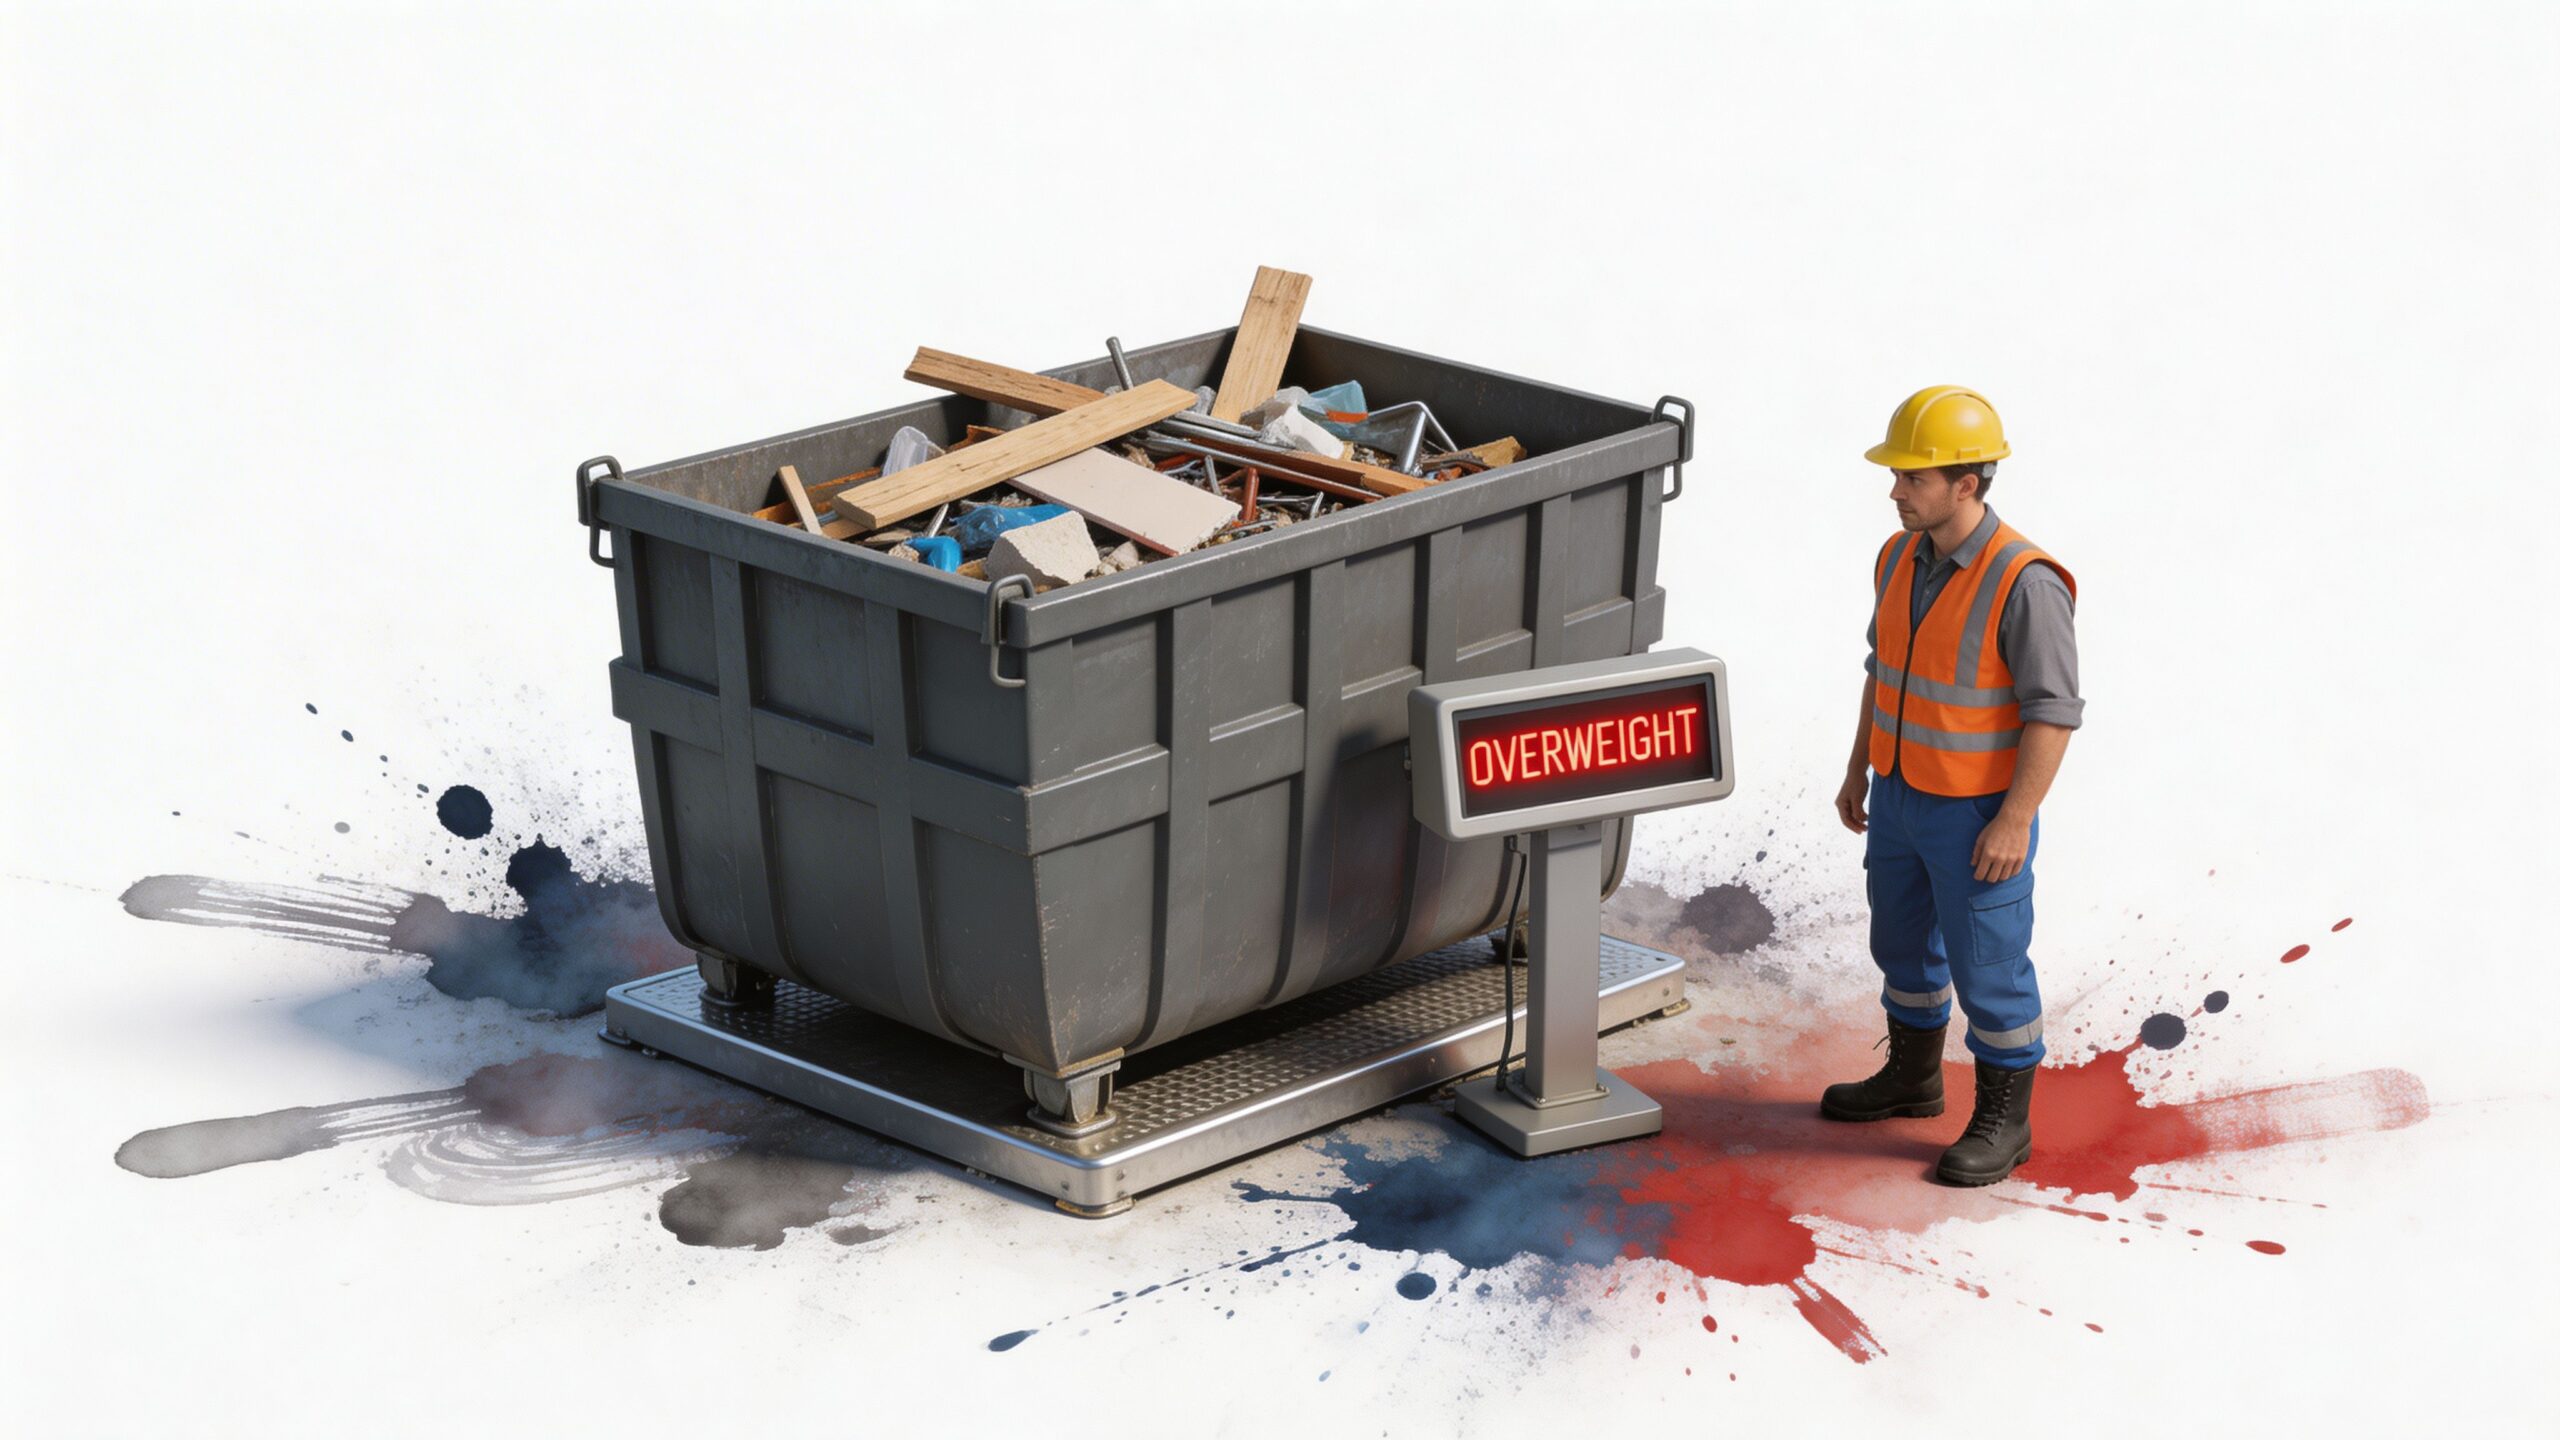
Why heavy material breaks the usual sizing logic
Typical roll-off weight limits scale with size. Industry guidance commonly places them with increasing limits for larger capacities, such as for 10-yard containers up to 40-yard containers. Those are practical planning numbers from the standard sizing data already covered earlier.
That’s enough for many mixed debris jobs. It is not generous once concrete enters the picture.
A documented gap in common dumpster advice is that a 20-yard dumpster may hit a 4-ton limit for wet concrete long before it’s full, which can trigger overage fees of $50 to $100 per ton or a refused pickup, according to this discussion of dumpster sizing limits and overload risk. The same source says 2025 US DOT data showed 22% of construction hauls were rejected for overload.
What that means on a real job
If the material is dense, the operational question changes from “How many yards do we need?” to “How much weight can we legally and economically move in one container?”
That’s why smaller boxes often make more sense for heavy debris. Not because the project is small, but because the material is dense enough that a larger box invites overloading.
Use this field logic:
- Concrete and brick need conservative loading.
- Wet material creates faster weight buildup than crews expect.
- Mixed loads become harder to predict and easier to mismanage.
- Overweight containers slow pickup, create sorting work, and can force partial offloading on site.
Don’t size a concrete debris container by wall height. Size it by the point where the hauler will still take it.
A new lead should remember one thing above all: with heavy material, weight is usually the controlling spec. Volume is secondary.
Site Placement and Truck Access Requirements
A well-sized container still causes problems if the truck can’t place it where the work needs it.
That happens more often than it should. Someone picks a corner of the lot that looks open, but the truck approach is poor, the ground won’t support the drop, or the box blocks another trade once it’s in place.
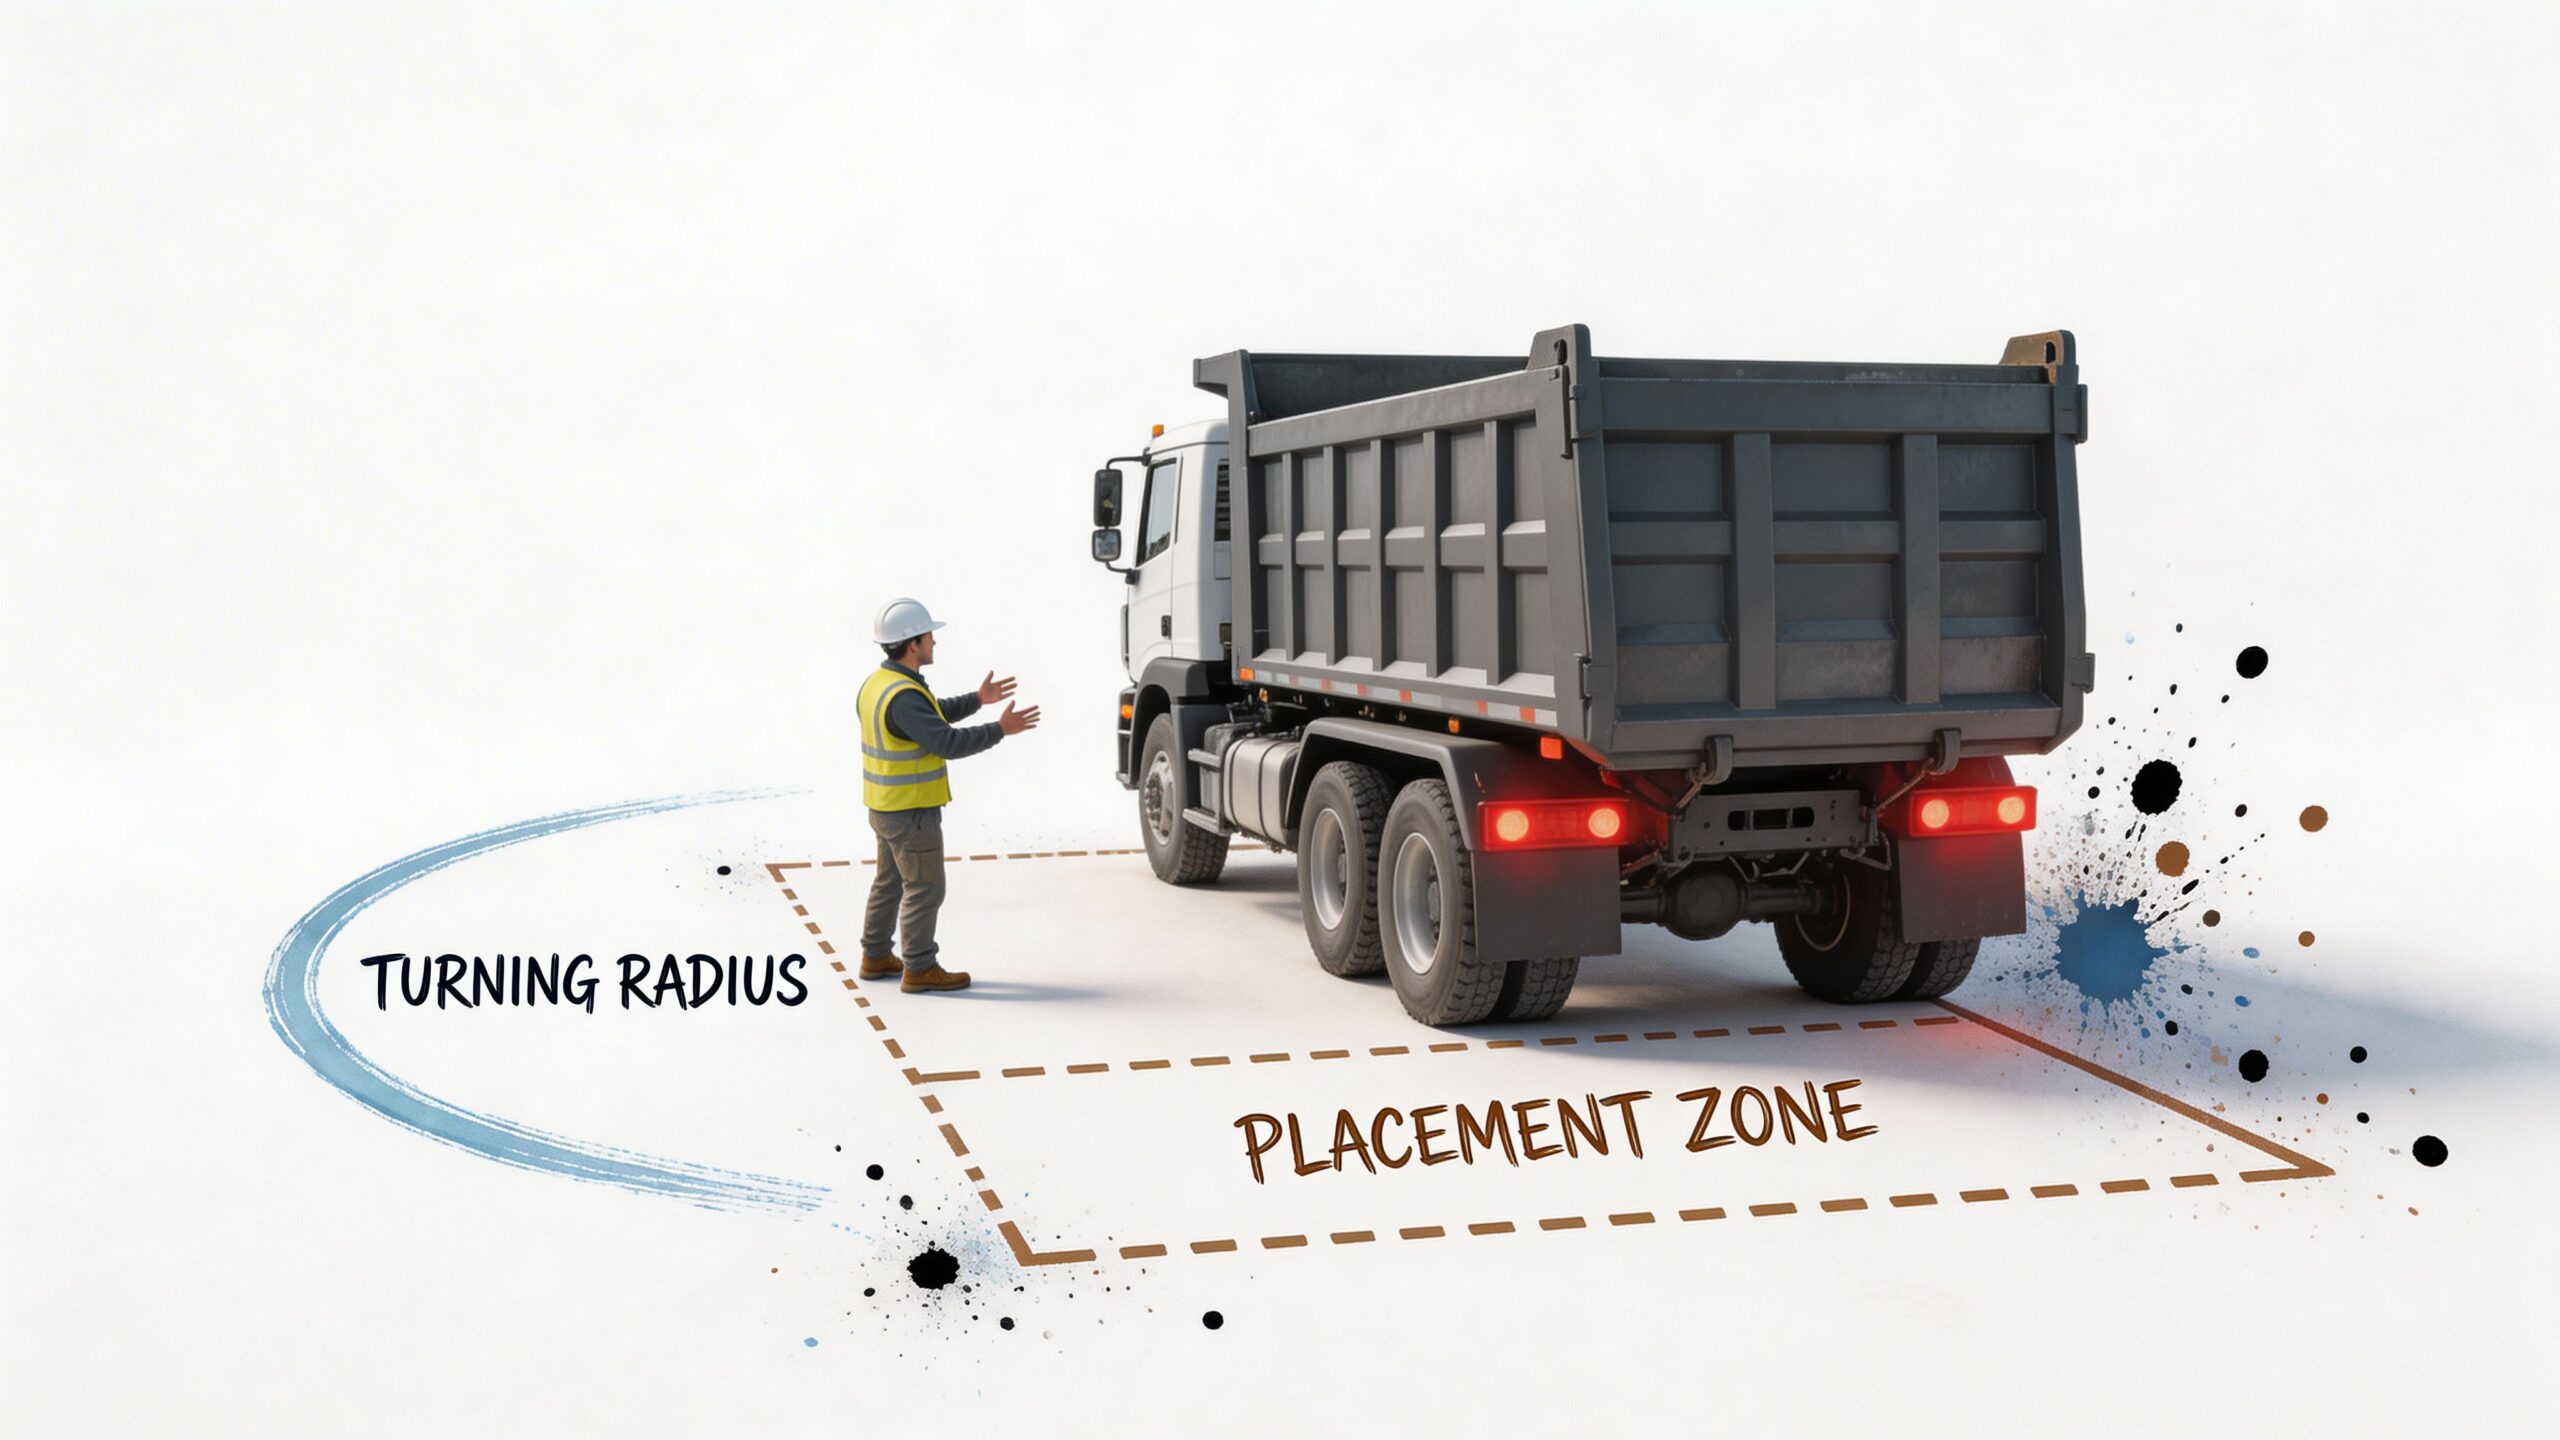
Minimum footprint is only the start
Standard dumpster enclosures need at least a 10-foot by 12-foot footprint with 2 feet of side clearance, based on these dumpster enclosure dimension guidelines. That gives you a baseline for how much dedicated space a container setup needs.
On an active job, that’s only part of the picture. Roll-off delivery also needs clear approach and retrieval paths. The truck has to line up, lower the container safely, and come back later when the load is heavier and site conditions may be worse.
What works on site
Before delivery, check these items in person:
- Ground condition: Pavement and compacted surfaces are safer than soft or recently disturbed ground.
- Overhead clearance: Watch power lines, scaffolding, temporary poles, trees, and building overhangs.
- Trade interference: Keep the box out of concrete pump paths, loading zones, and emergency access routes.
- Door and gate width: Entry restrictions can kill a placement plan before the truck even turns in.
Positioning mistakes that cost time
The worst placements usually share one of two problems.
The first is putting the dumpster too far from the work. Crews then waste labor walking debris, and the area around the work face turns into an informal pile.
The second is placing it in the perfect debris location but the worst pickup location. That’s how jobs end up shuffling equipment just to swap a container.
Place the dumpster where the crew can use it daily, but where the hauler can still reach it without a site-wide reset.
A good placement plan serves both the field crew and the driver. If it only works for one of them, it doesn’t really work.
Navigating Permits for Street and Sidewalk Placement
On tight urban sites, you may not have enough room to keep a dumpster fully on private property. That usually means using part of a street, alley, or sidewalk edge. Once you do that, permit requirements come into play.
Most municipalities require some form of right-of-way, street occupancy, or encroachment permit for placing a container on public space. The exact name changes by city, but the practical issue is the same. The local authority wants to know what will be placed, where it will sit, how long it will stay, and whether it affects traffic or pedestrians.
What the city usually asks for
Expect to provide details such as:
- Container dimensions: Length, width, and general height profile
- Placement duration: Start and end dates
- Site location: Exact curb line or frontage area
- Traffic or pedestrian protection: Cones, barricades, reflective markings, or walkway controls where required
How to handle it without creating schedule trouble
Don’t wait until the dumpster is already booked. Permit review doesn’t always move on field time.
A practical approach is to confirm public-space use during preconstruction or at least during early site logistics planning. If you already know the site is constrained, treat permit lead time as part of the rental plan, not as an admin task somebody can squeeze in later.
Also verify who is responsible. On some jobs, the GC handles it. On others, the owner, tenant improvement contractor, or hauling vendor may be involved. That has to be clear before delivery day.
If a city inspector sees an unpermitted dumpster on a public street, the outcome is usually simple and unpleasant. You may get a notice, a fine, or an order to move it immediately. None of those help the schedule.
Choosing the Right Container for Concrete Washout
Standard roll-off dumpsters solve a lot of debris problems. Concrete washout is different.
Washout isn’t just “trash with water in it.” It’s a messy combination of slurry, residual concrete, rinse water, and hardened buildup that needs controlled containment. Standard dumpster guides usually stop at yardage, and that’s exactly why crews run into trouble on concrete work.
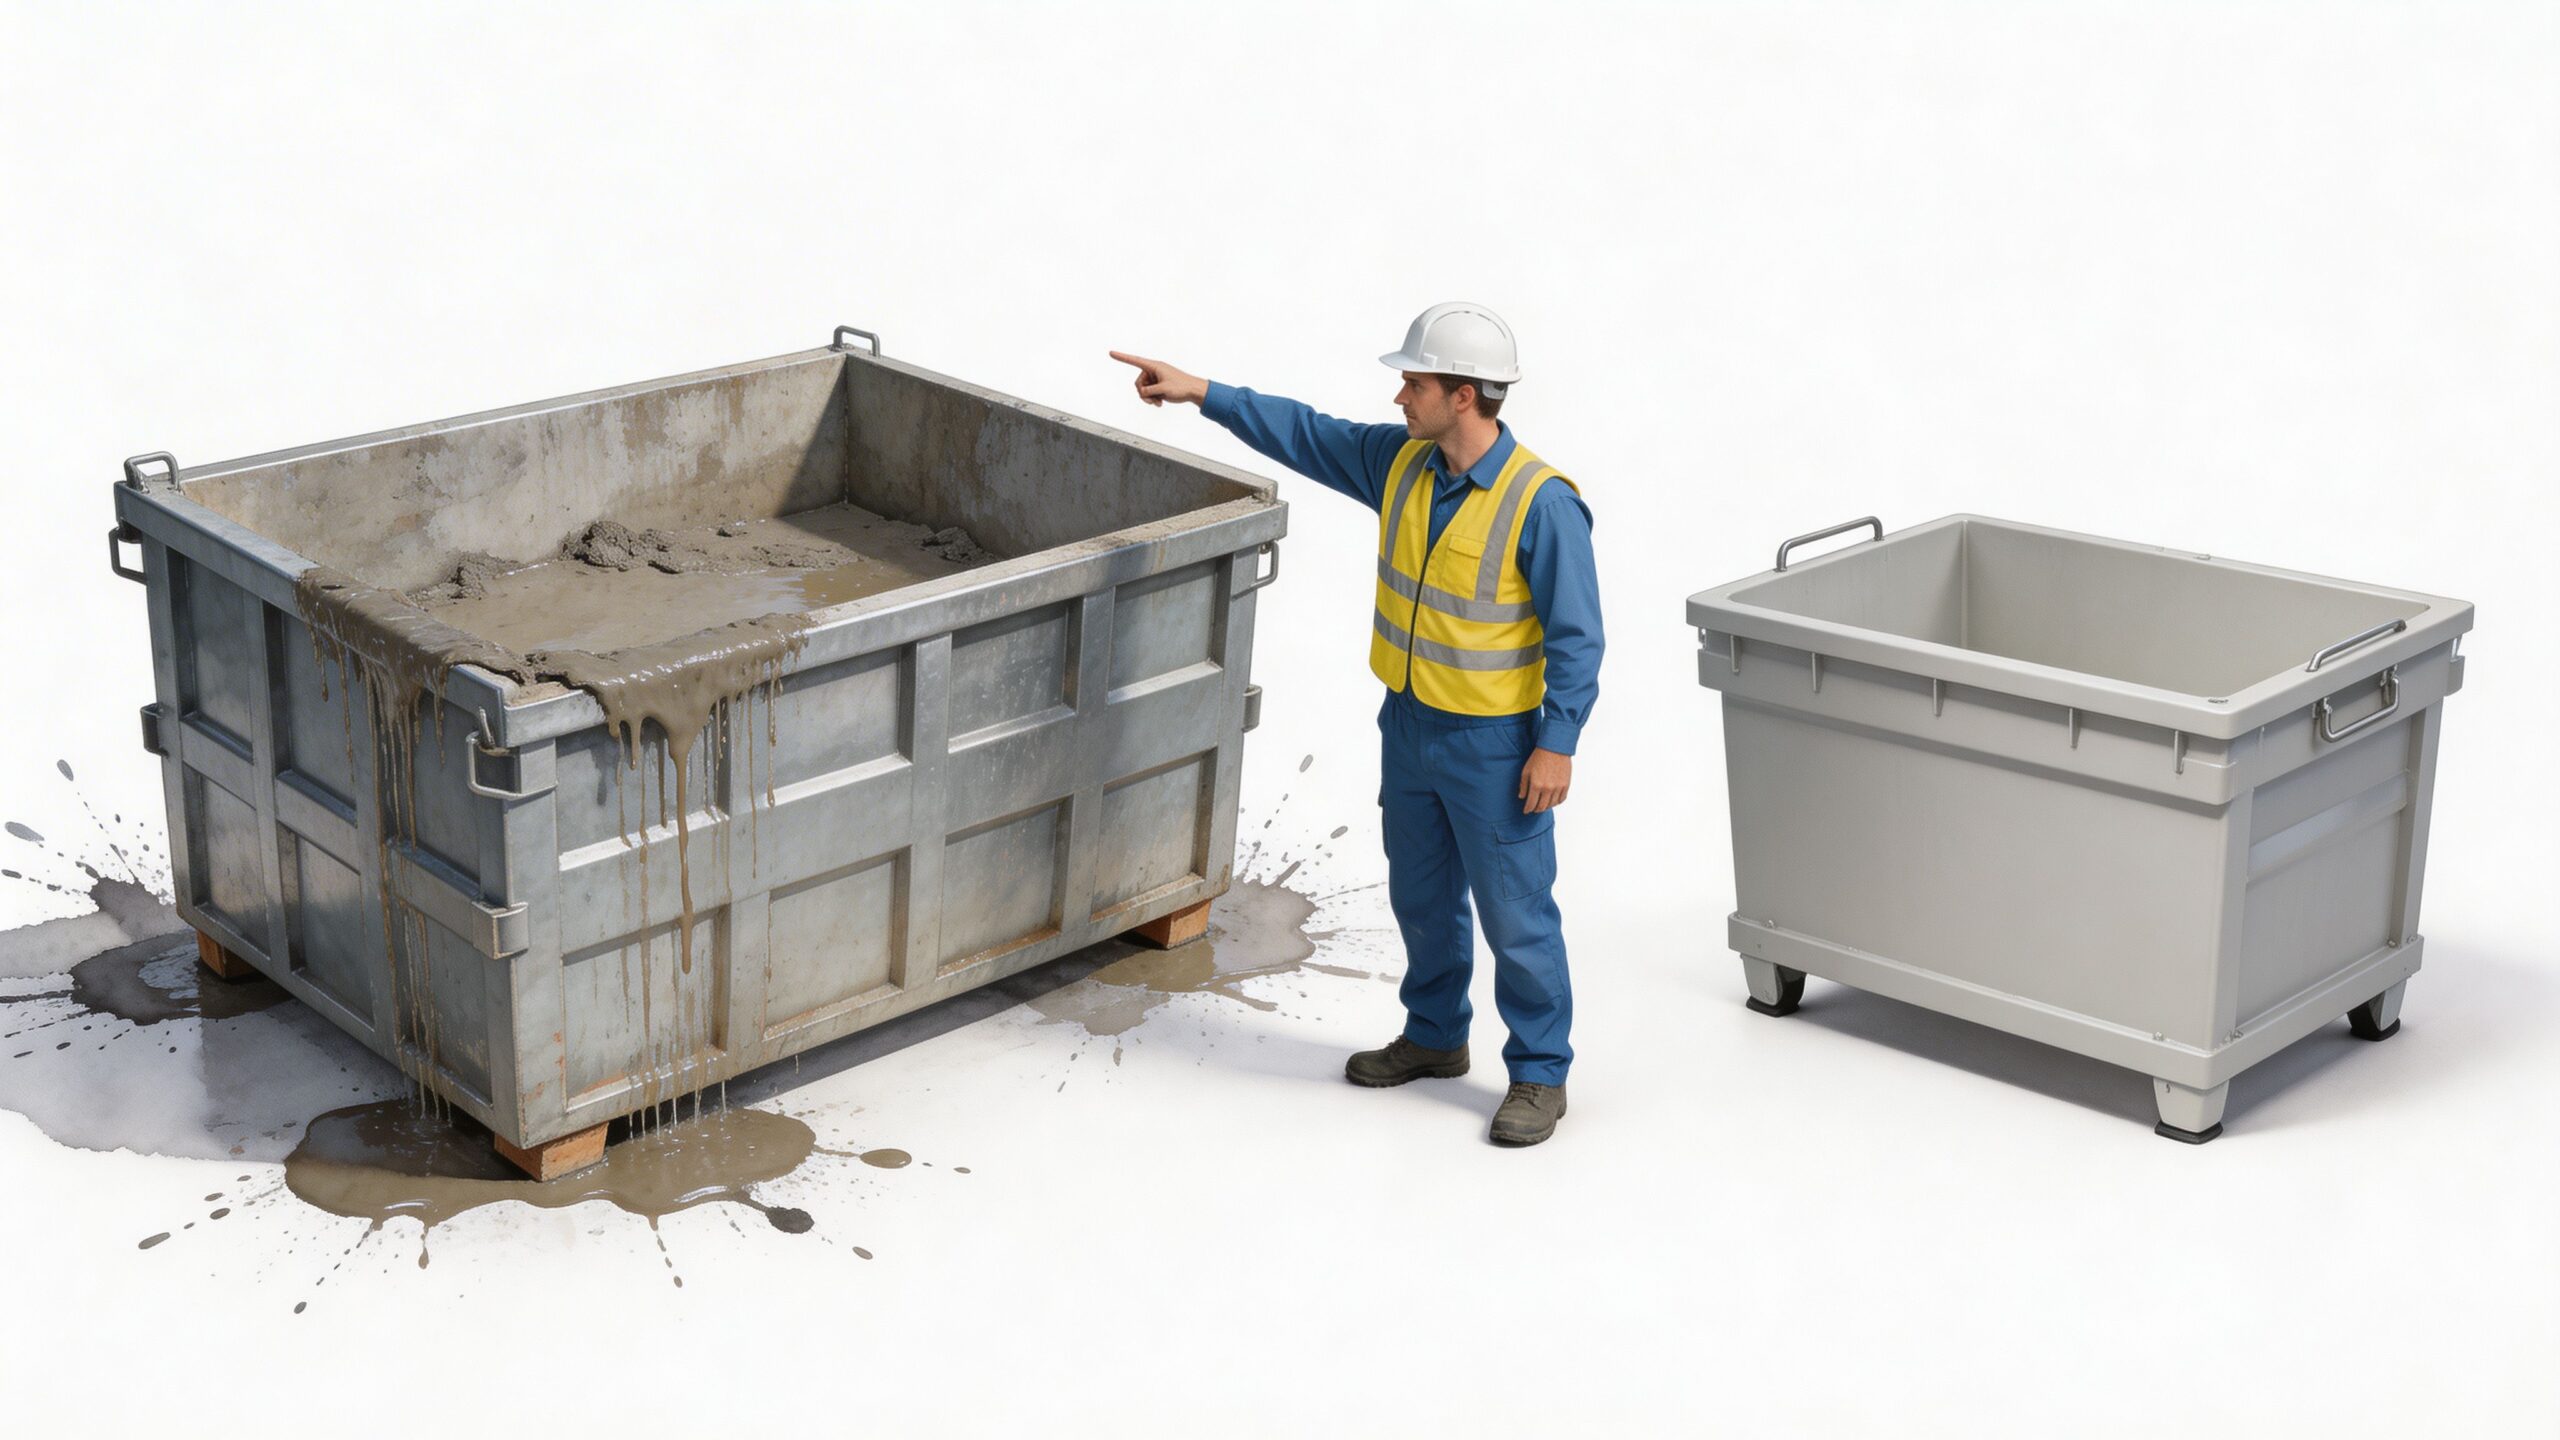
Why a standard roll off is often the wrong tool
For ordinary debris, matching project scope to dumpster size is straightforward. Industry guidance commonly ties larger containers to home remodels, while roofing or cement disposal often uses smaller containers. It also notes that undersizing increases cost and delays, according to this guide on construction dumpster rental sizes and services.
That advice is useful, but it still leaves a gap on washout work.
Concrete washout creates problems that a normal roll-off may not handle well:
- Liquid content: Slurry doesn’t behave like dry debris.
- Concentrated weight: Residual concrete builds weight quickly in a small area.
- Containment risk: Improper handling creates spill and cleanup exposure.
- Operational mess: Once crews start improvising washout, site control degrades fast.
What works better
Dedicated washout containers are built for this exact need. They give the crew a defined place to wash out chutes, pumps, and tools without turning a general debris box into a fluid containment problem.
Good washout planning does three things at once:
- Keeps slurry in one controlled location.
- Separates washout from general demolition debris.
- Makes pickup and final handling more predictable.
Concrete washout should be planned like a controlled process, not left as an end-of-day cleanup task.
Many standard dumpster charts fall short here. They help with volume, but they don’t address the field reality of wet, dense, high-risk material. On concrete jobs, that omission matters.
Example Calculation for Washout Capacity and Weight
A simple example shows why washout planning needs its own container strategy.
Assume a pour day leaves residual concrete and rinse water that crews need to contain in one location. You’re not just managing volume. You’re managing a dense, wet load that behaves differently from mixed jobsite debris.
Step through the container thinking
Use this sequence:
- Estimate slurry-producing activity from trucks, pumps, or tool cleanup.
- Separate liquid washout from dry debris instead of treating them as one waste stream.
- Match the containment device to both liquid capacity and load capacity.
The reason this matters is straightforward. A standard dumpster may offer plenty of open space but still be the wrong vessel for washout residue because the material is concentrated, wet, and operationally awkward to manage once it starts collecting at the bottom.
Practical benchmark for washout equipment
Purpose-built washout pans make planning cleaner because their specifications are tied to containment use, not just demolition volume.
The publisher’s equipment information describes a 72' x 72' x 24' washout container with approximately 18.25 tons capacity and about 441 gallons, and a 72' x 72' x 14' option with about 310 gallons. Those details matter because they let a site team evaluate both liquid containment and load handling before the first truck washes out.
That’s the right way to think about washout sizing:
| Question | Standard dumpster thinking | Washout container thinking |
|---|---|---|
| Main concern | How many cubic yards fit | How much slurry and hardened material can be contained safely |
| Loading style | Mixed debris tossed by volume | Controlled washout into a defined pan |
| Failure point | Box fills up | Weight, liquid handling, and containment become the issue first |
The field takeaway
If you try to use a general dumpster as a washout solution, the crew often ends up fighting the wrong problem. The container may be physically large, but the use case is poor.
A dedicated washout pan gives you a known containment area, a predictable cleanup routine, and less improvisation from the field. On concrete work, that’s usually the difference between planned handling and a site mess that keeps getting worse through the day.
Conclusion Key Takeaways for Smart Dumpster Planning
Good dumpster planning comes down to three things: dimensions, weight, and placement.
Dimensions tell you whether the container fits the site and the debris volume. Weight tells you whether the load can be hauled. Placement decides whether the crew and the driver can both do their jobs without disrupting the project.
For light mixed debris, standard roll-off sizing works well. For dense material, especially concrete, the decision changes fast. A container can have room left and still be a bad load. That’s the mistake to avoid.
The most reliable approach is simple:
- confirm the dumpster’s outside footprint
- match the yardage to the project scope
- check the material weight profile before loading
- plan the drop zone before the truck arrives
- use dedicated washout containment for concrete operations
Treat dumpster selection like a real logistics item, because that’s what it is. When you do, the site stays cleaner, pickups stay predictable, and fewer problems show up at the worst possible time.
Frequently Asked Questions
Can I mix concrete with other construction debris in one dumpster
Usually, that’s a bad idea. Mixed loads are harder to control, harder to estimate by weight, and more likely to create pickup issues. Concrete is dense enough that it can turn a general debris box into an overload problem before the container looks full.
What happens if my dumpster is overweight
The usual outcomes are overage charges, refused pickup, or having to remove material before the hauler will take the container. On a busy site, that also means labor gets pulled into rehandling debris instead of staying on production work.
Is a bigger dumpster always safer
No. Bigger helps with bulky light debris. It does not automatically help with dense debris. For heavy material, a larger box can encourage overloading if the crew judges capacity by open space instead of by allowable weight.
What should I check before a dumpster is delivered
Confirm four things:
- Access path: The truck has a clean route in and out.
- Drop surface: Ground is stable enough for placement and pickup.
- Overhead conditions: No wires, branches, or structures interfere.
- Work flow: The box won’t block pumps, deliveries, or trade access.
When should I use a dedicated washout container instead of a roll off
Use one when the job includes regular concrete truck, pump, chute, or tool washout. That’s a separate containment need from normal job debris and should be treated that way from the start.
If your project includes concrete washout, skip the guesswork and use equipment built for that job. Reborn Rentals provides specialized washout pans and containers with clear specs, transparent pricing, and straightforward scheduling so crews can contain slurry responsibly and keep sites organized.