The pour is done. The truck is waiting. The crew wants to clean the chute and move on.
That is the moment when a job either looks professional or starts sliding toward a mess.
Too many sites still treat washout like an afterthought. Someone points to a low corner of the lot. Someone else says they will dig a quick pit. A laborer grabs whatever plastic is nearby and hopes it holds. Then the slurry spreads, boots track it everywhere, rain turns it into runoff, and the superintendent gets stuck dealing with something that should have been planned before the first yard showed up.
A concrete washout container is not just a convenience item. It is one of the simplest ways to protect the site, keep the crew moving, and avoid a compliance problem that can get expensive fast.
The Hidden Risks of Every Concrete Pour
I have seen the same problem on big civil work, small commercial jobs, and tight renovation sites. The pour itself is organized. The finishers know their sequence. The pump is staged right. Then the work ends, and nobody has a clean answer for washout.
That is where trouble starts.
A mixer driver rinses out where he can. The pump crew washes into a scraped-out depression. Somebody says they will deal with it later. Later usually means after the slurry has hardened in the wrong place, after runoff has reached the edge of the site, or after an inspector asks why there is alkaline waste sitting exposed on bare soil.

The old excuses do not hold up well in the field.
What usually goes wrong
- The pit is in the wrong spot: It is convenient for the truck, but too close to drainage paths or active traffic.
- The liner fails: Thin plastic tears, shifts, or bunches up under slurry and rinse water.
- Rain changes everything: What looked manageable in dry weather turns into overflow risk as soon as water starts collecting.
- Cleanup gets pushed down the list: Hardened material stays longer than it should, and the site loses control of the area.
A proper container fixes the basic problem because it gives the crew one designated place to wash out, every time. No guessing. No improvised berms. No arguing about where the truck should go.
Tip: If your washout plan depends on the crew improvising under schedule pressure, it is not a plan. It is a liability waiting for a bad day.
The best sites treat washout the same way they treat traffic control or formwork layout. It gets decided early, marked clearly, and maintained daily.
Understanding the Concrete Washout Container
A concrete washout container is the job site's dedicated sink for concrete waste. It is built to take wash water, slurry, and leftover solids from chute rinsing, pump cleanup, and similar activities without letting that material seep into soil or wander across the site.
That sounds simple. In practice, that dedicated containment changes everything.
What it is supposed to do
The container has one core job. It must hold the waste reliably until the material can be removed, treated, recycled, or disposed of properly.
That means the unit needs to be:
- Watertight
- Stable on site
- Easy for crews to access
- Able to handle both liquid and solids
- Built for repeat use in rough conditions
The volume matters more than many teams expect. The need for a dedicated system becomes obvious when you look at rinse water alone. Industry guidance notes that washing one truck chute uses 7 gallons of wash water, and washing a concrete pump hopper uses 50 gallons. Even a modest pour can generate more contaminated water than people realize.
Why makeshift setups fail
An unlined pit can look cheap on day one and expensive by day three.
Plastic draped over hay bales or laid loosely in an an excavated hole often fails for predictable reasons. Equipment clips the edge. Crews step into it. Water collects unevenly. The liner shifts. Once the setup loses shape, the washout area stops being containment and starts being spill control by wishful thinking.
A purpose-built container solves that by giving you a defined footprint and a controlled cleanup process.
How it works in the field
The basic flow is straightforward:
- Truck or pump washes into the container
- Solids settle and accumulate
- Liquids stay contained for management
- The contents get removed before capacity becomes a problem
Some operations reclaim useful material from washout streams. Others focus on clean containment and compliant hauling. Either way, the container gives the project a repeatable system instead of a daily workaround.
Think of it as operational control
Its value is not just that it holds slurry. It creates order.
A good washout setup tells drivers where to go, keeps labor from wasting time on cleanup, protects surrounding work, and gives the superintendent a controlled area to inspect. That is the difference between a site that looks buttoned up and one that always seems one rain event away from a mess.
Navigating Environmental Regulations and Avoiding Fines
Concrete washout becomes a legal issue the moment contaminated water leaves the containment area.
Most crews understand that wash water is dirty. Fewer people respect how aggressive it is. Concrete slurry is highly alkaline, and guidance in this space notes that wash water can reach very high pH levels. Once that material gets into soil, stormwater flow paths, or nearby water, the problem is no longer housekeeping. It is a compliance event.
Why inspectors care
Inspectors are not looking at washout as a minor site annoyance. They are looking at it as a discharge risk.
If slurry escapes the designated area, several things happen at once:
- Stormwater compliance gets questioned
- SWPPP controls look weak
- Documentation and maintenance records matter immediately
- The contractor may need to prove the release was contained and corrected
This is why crews get into trouble with “temporary” fixes that stay in place too long. Once a setup is leaking, overfilled, or poorly located, it signals weak control of the site.
The fine is not the only cost
The direct penalty is bad enough. EPA BMP non-compliance for concrete washout can lead to Clean Water Act fines that may exceed $10,000 per violation.
That gets attention fast, but the fine is not the whole story.
A washout failure can also create:
| Problem | What it does to the job |
|---|---|
| Rework | Pulls labor into cleanup instead of production |
| Schedule drag | Delays pours, haul-off, and inspections |
| Reputation damage | Makes owners and GCs question site control |
| Extra disposal handling | Turns a manageable waste stream into a more complicated cleanup |
For contractors, this is why proactive containment beats reactive cleanup every time.
Compliance is operational discipline
The crews that stay out of trouble usually do the boring things well.
They pick a defined washout area before the first truck arrives. They make sure everyone on site knows where it is. They check the unit daily. They service it before it becomes a problem, not after.
Key takeaway: A compliant washout setup is cheaper than a preventable violation, and it is easier to manage than an improvised cleanup under scrutiny.
What practical compliance looks like
Strong field practice usually includes:
- A designated container, not an an ad hoc hole
- Clear access for trucks and pump crews
- Routine inspections
- Timely removal before overflow or structural failure
- Records that show the site is managing waste intentionally
The best superintendents do not wait for a rain forecast or a visit from an inspector to tighten this up. They treat washout as part of production planning because that is what it is. It affects labor, traffic flow, schedule reliability, and risk.
If your site still handles washout like a side task, the fix is not complicated. Assign the area, use the right container, and manage it daily. That is how you stay ahead of both the environmental issue and the paperwork that follows it.
How to Choose the Right Washout Container Size
Sizing mistakes create two kinds of pain. One is obvious: the container fills too fast. The other is quieter: you over-order, crowd the site, and pay for capacity you do not need.
A practical sizing decision starts with the work itself, not the rental sheet.
Start with the pour volume
The cleanest rule of thumb in the field is the one tied directly to placement volume. Industry guidance recommends at least 6 cubic feet of containment for every 10 cubic yards of concrete poured.
That gives you a planning baseline. It is not a substitute for judgment, but it is a solid start.
If the project includes frequent chute rinsing, pump cleanup, or several consecutive pour days, build more room into the plan. A container that looks adequate on paper can become undersized once real site behavior gets added to the equation.
The liner matters as much as the box
A washout container is only as reliable as the part that keeps the liquid in.
That same guidance calls for minimum thick polyethylene liners. Thin or poorly secured liners are one of the most common failure points in improvised setups. Once they slip, puncture, or bunch up, you lose confidence in the whole containment system.
When evaluating a unit, do not just ask how much it holds. Ask how it is lined, how that liner is secured, and how easy it is to inspect.
Use the project profile, not just the container dimensions
I size washout around four job realities:
Number of wash events
A single placement with one truck pattern is different from a site with repeated rinsing all day. Pump work changes the math because pump cleanup adds a lot of water and slurry in a hurry.
Duration on site
A short placement can use a tighter setup if removal is scheduled promptly. Multi-week activity needs more margin because delays happen, weather shifts, and crews rarely generate less washout than expected.
Available access
A larger container is not automatically better if trucks cannot reach it cleanly or if it blocks active work. Tight urban jobs, interior courtyard work, and renovation sites often need a more deliberate approach.
Removal plan
The right size depends on how often the unit will be serviced or swapped. A moderate-size container with dependable haul-off often works better than an oversized unit left unattended.
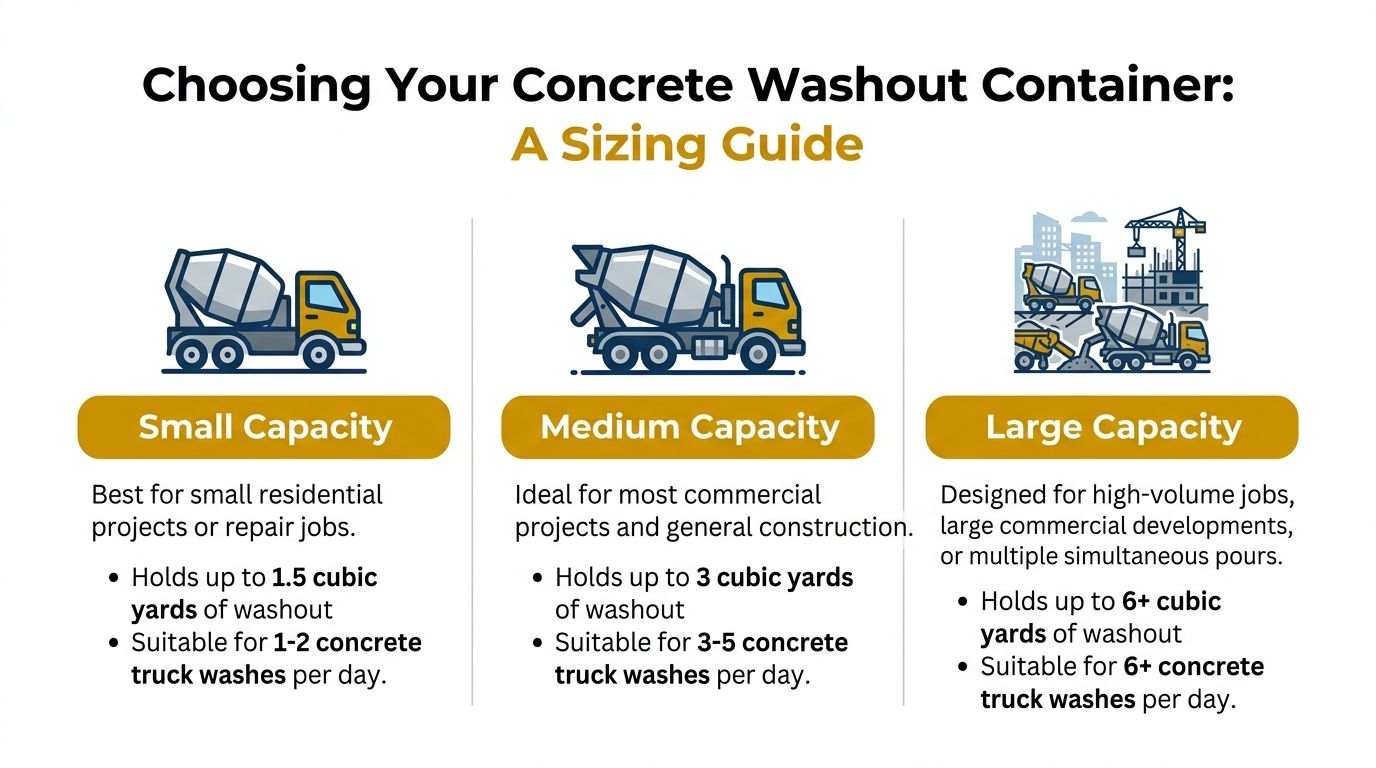
A simple field comparison
| Job condition | What usually works best |
|---|---|
| Small repair or light residential concrete activity | Compact containment with easy pickup and close supervision |
| General commercial pour sequence | Mid-range unit with enough room for repeated washout and weather buffer |
| High-volume pours or multiple active crews | Larger capacity or multiple containers staged by operation |
That last point matters. On busy projects, one giant washout area can create traffic conflicts. Two smaller, well-placed units can be more reliable because crews are more likely to use them correctly.
Tip: Size for the worst normal day on the project, not the average day. Average-day planning causes overfill during the exact shift when nobody has time to stop.
Think about total cost, not sticker price
Contractors often overlook the true trade-off here.
A cheap DIY pit can look good in a budget meeting because the upfront line item appears small. But the total cost includes labor to build it, labor to maintain it, time spent protecting it from weather, cleanup if it fails, and the disruption it causes when trucks cannot use it efficiently.
A properly sized rental container changes that equation because the cost is visible up front. The hidden labor usually drops. The containment is more predictable. The site looks cleaner. The crew wastes less time debating what to do after each wash.
For short jobs, that predictability often matters more than shaving a little off the initial setup cost. For longer jobs, reliability and service planning usually matter even more.
Best Practices for Site Placement and Daily Use
A good container in the wrong location still causes headaches. Placement is where compliance, efficiency, and safety all come together.
I have seen sites rent the right equipment and still make life harder than it needs to be because the washout got dropped wherever space happened to be open that morning.
Put it where crews will use it
The best washout area is close enough to the work to be convenient, but not so close that it interferes with traffic, staging, or pedestrian flow.
The distance rule is clear. Washout containers should be kept a safe distance from storm drains, inlets, or water bodies, and they should be checked daily so capacity does not exceed specified limits before removal is handled, as noted in earlier guidance on washout management.
That is the compliance side. The production side matters too.
A practical location should be:
- On level ground
- Clear of routine traffic pinch points
- Accessible to mixer and pump crews without awkward backing
- Away from public access
- Easy for the superintendent or foreman to inspect
Daily use rules that keep the site under control
A washout area should run like any other controlled operation on site. That means rules everybody knows and follows.
Keep one container for one purpose
Do not let the washout become a general trash point. Once crews start tossing random debris into it, removal gets harder and contamination control gets sloppier.
Check it every day
The check does not need to be complicated. Look for liner damage, sidewall wear, leaks, access issues, and rising fill level. The goal is to catch problems while they are still easy to fix.
Watch weather closely
Rain changes available capacity. An uncovered or neglected unit can become an overflow risk faster than expected during extended wet weather. On jobs with repeated pours, weather review should be part of the daily huddle.
Tip: The fastest way to lose control of washout is to assume yesterday’s available capacity still exists after a storm.
A simple field checklist
Here is the routine that works:
- Inspect before concrete activity starts
- Confirm truck and pump crews know the location
- Check that approach and exit paths are clear
- Verify the liner and structure look intact
- Review fill level before the next pour sequence
- Schedule removal before the unit becomes a problem
A short refresher for the crew helps too, especially when new drivers or subcontractors rotate onto the job.
When one container is not enough
On larger sites, the best answer is often distribution rather than size alone.
If one washout area forces trucks to cross active haul routes or back through congestion, the operational risk goes up. Missed use, rushed washout, and edge spills become more likely. In that situation, multiple containers can improve reliability because each crew has a practical option near its work zone.
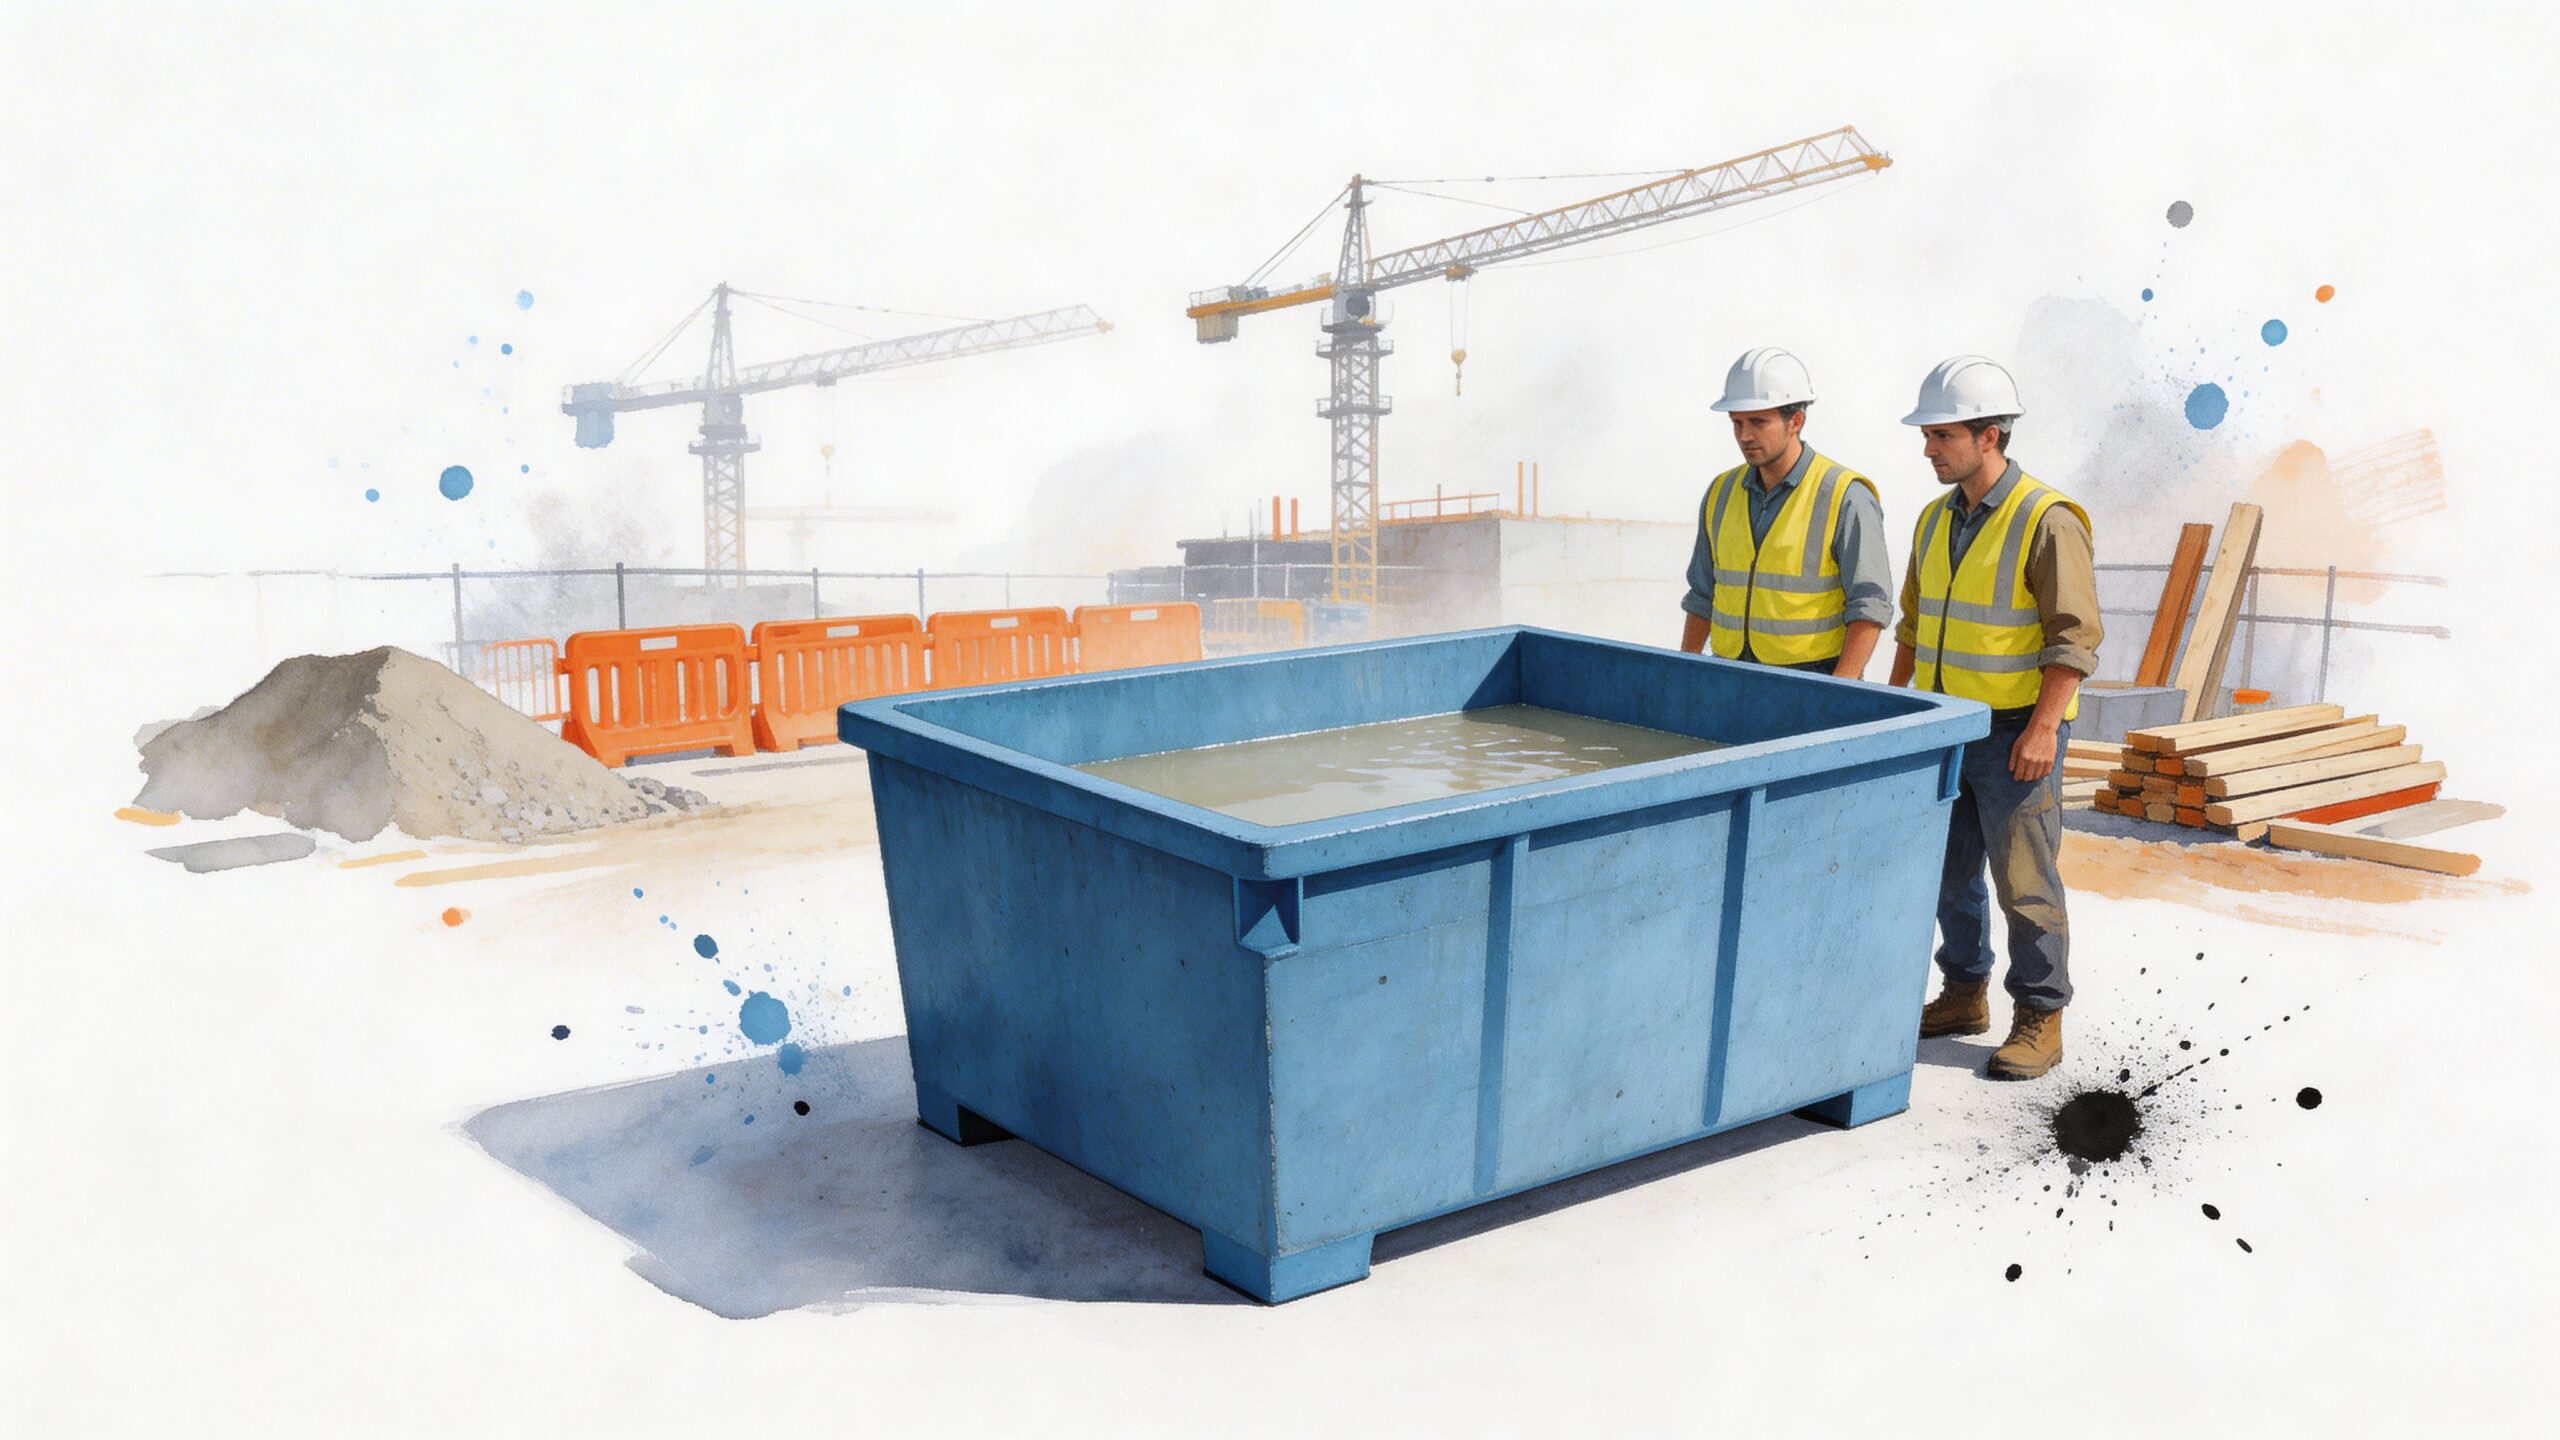
This walkthrough shows the kind of field setup crews should aim for during active use:
What does not work
The repeat offenders are familiar:
- Steep or soft ground
- Container access through active laydown areas
- Units placed too far away, so crews wash out somewhere else
- Ignoring fill level until the day of the next pour
- Assuming a quick patch can fix a failing liner
A concrete washout container works best when it is boring. Everyone knows where it is. It stays in shape. It gets serviced on time. Nobody argues about it because the system does its job.
Streamlining Your Rental Logistics with Reborn Rentals
The practical argument for renting a washout container comes down to one question. Do you want your team spending time building and babysitting a temporary containment setup, or do you want them focused on production?
That is where total cost of ownership matters more than the first number on a quote.
What rental solves that DIY does not
A DIY pit or lined area can work in limited circumstances, but it carries hidden labor from the start. Someone has to prepare the area, source materials, set liners, protect the edges, monitor condition, and deal with cleanup if the setup underperforms.
A rental unit shifts that equation.
Instead of building a one-off solution, the project gets a container designed for washout duty. That means cleaner deployment, more predictable maintenance, and easier planning around removal and replacement.
The financial logic behind modern systems is strong in larger operations. One industry analysis notes that reclaiming aggregates from 20 cubic yards of returned concrete per day can produce $130,000 in annual savings, while operations with 20 trucks can save up to $500,000 annually by moving from traditional pits to modern systems. Most individual jobs are smaller than that, but the lesson still applies: better washout handling reduces waste, labor drag, and avoidable disruption.
Where rental makes the most sense
Rental is usually the cleanest choice when:
- The project is short-term and you need fast setup
- The site is constrained and cannot support a messy improvised pit
- You need a predictable line item instead of variable field labor
- The owner, CM, or SWPPP consultant expects visible compliance
- You are running multiple small jobs and want a repeatable process
For facilities work and renovation work, this matters even more. Those sites often have less room for error, less tolerance for visible mess, and more scrutiny from property teams.
A smoother ordering process helps the field
One of the biggest advantages in a rental program is not just the equipment. It is the logistics.
A simple ordering path cuts out phone-tag and uncertainty. Reborn Rentals uses a straightforward Cart → Details → Checkout flow, which matches how field teams plan work. Add the unit, set dates and location, confirm delivery, and move on.
That matters because washout is rarely the only thing a superintendent is coordinating. If ordering takes too much back-and-forth, the task gets delayed. Then people fall back on temporary fixes.
Transparent pricing is part of compliance
Reborn Rentals publishes upfront daily pricing through its rental platform, with notes about possible added charges for delivery, rough terrain, and express requests. That kind of transparency helps teams budget accurately.
The hidden cost in washout is rarely the rental invoice. It is the labor lost to a weak setup, the cleanup after a spill, or the stress of trying to fix a compliance issue during active production.
When the cost structure is visible, site managers can make a cleaner decision:
| Option | What you see | What you may miss |
|---|---|---|
| DIY pit or lined area | Lower apparent setup cost | Labor, maintenance, weather exposure, cleanup risk |
| Rental container | Clear daily charge | Usually fewer field unknowns and less improvisation |
Reliability is what crews remember
Field teams do not judge a washout plan by how it looked in procurement. They judge it by whether it held up on pour day.
If the container is where it should be, easy to use, and easy to service, the crew notices. If the setup leaks, fills too fast, or blocks traffic, they notice that too.
That is why good rental logistics are not just administrative convenience. They support real site performance. The less energy your team spends managing the containment method itself, the more attention they can put on concrete quality, schedule, and safety.
Frequently Asked Questions from the Job Site
What should we do with the hardened material after the water is gone
Treat it as a managed waste stream, not as random rubble to scatter around the site.
Once washout solids have hardened, teams typically arrange proper disposal or recycling through approved channels. In many operations, solids are separated and routed for reuse as aggregate or similar recovered material. The key is to follow the job requirements, local disposal rules, and the handling plan already tied to your project documentation.
Can one concrete washout container be moved between jobs
Yes, but only if you move it deliberately.
Before relocating a container, make sure it is suitable for transport, not overfilled, and not at risk of spilling during movement. A sloppy relocation can turn a contained waste stream into a site incident. On multi-site operations, the smarter move is usually to plan service and relocation around actual pour schedules, not just convenience.
How do we handle heavy rain during an extended project
Do not wait for the rain to start.
Rain planning should be part of your daily review when washout remains on site for more than a short pour sequence. Check fill levels early, verify the container is still sound, and schedule service before weather removes your capacity margin. If the project has sustained concrete activity, some teams improve reliability by staging more than one container rather than relying on a single unit with no backup.
Tip: Overflow prevention is mostly scheduling. If you wait until the container looks full, you are already late.
Is one large container always better than multiple smaller ones
Not always.
One larger unit may simplify servicing, but it can also create traffic conflict or make crews walk farther than they should. When people have to go out of their way to use the washout, compliance slips. On spread-out sites, multiple containers often improve actual field use because each crew has a practical option nearby.
What daily checks matter most
Keep it simple and repeatable.
Focus on:
- Fill level
- Visible leaks
- Liner condition
- Stable ground support
- Clear truck access
- No unauthorized debris in the container
The best daily inspection is the one that happens. A short, disciplined check beats a detailed checklist nobody uses.
Can a container solve both compliance and productivity issues
Yes, if the crew treats it as part of the operation.
A washout container does more than contain slurry. It reduces confusion at the end of the pour, keeps truck turnaround cleaner, and gives the site one controlled area for a messy task. That helps compliance, but it also helps workflow. The field usually runs better when washout is assigned, visible, and maintained instead of improvised.
If you need a straightforward way to keep concrete washout contained without building a temporary system from scratch, Reborn Rentals offers specialized washout rentals with clear daily pricing, practical capacity options, and a simple checkout flow that makes scheduling easier for busy job sites.