A pour is wrapping up, the pump hose is getting drug back to the truck, and somebody is already looking for a low spot to rinse the chutes. That is usually the moment the concrete washout detail stops being a line on a plan sheet and turns into a problem you either contained or you didn't. If the wash water heads toward a drain, a ditch, or the neighbor's grass, the project suddenly has a compliance issue, not a housekeeping issue.
A good concrete washout detail is the drawing that keeps that problem from starting. It tells the crew where to put the slurry, how much the container has to hold, what the liner has to be, and when the pit is full enough to stop using it. Done right, it protects the job, keeps the SWPPP consistent with the field setup, and gives the inspector something solid instead of a guess.
Why a Concrete Washout Detail Matters on Every Pour
The field version of this mistake is familiar. A pump truck finishes a mat pour, the crew rinses chutes into a grassy corner because it is close, and an inspector shows up the same afternoon. That's when everyone finds out the washout wasn't just supposed to be “somewhere over there,” it was supposed to be a contained BMP with a defined location, capacity, and service plan.
Concrete washout is regulated because the slurry is highly alkaline and has to stay out of storm drains and waterways. U.S. state and local manuals treat it as a contained stormwater control, not a convenience area, and some programs explicitly require 100% recycling of collected wash water and solids (EPA BMP guidance, Delaware washout handbook).
What the detail has to do
A washout detail has four jobs, and drawings that miss one of them usually fail in the field.
- Contain liquids. The slurry has to stay inside a leak-proof or lined area.
- Hold solids. Cement paste, sand, and debris need a place to settle without washing out.
- Signal service limits. Crews need a visible trigger for when the pit is nearing full.
- Survive inspection. The setup has to stand up to rain, truck traffic, and a SWPPP check.
Practical rule: if the detail does not tell a laborer where to dump, a foreman when to stop, and a vacuum truck where to pull in, it is not complete.
The best time to draw it is before mobilization. That is faster than trying to improvise a lined pit after the first mixer is already on site, and it gives the superintendent something that can be installed, inspected, and emptied without a debate every morning.
The Regulations Behind the Drawing
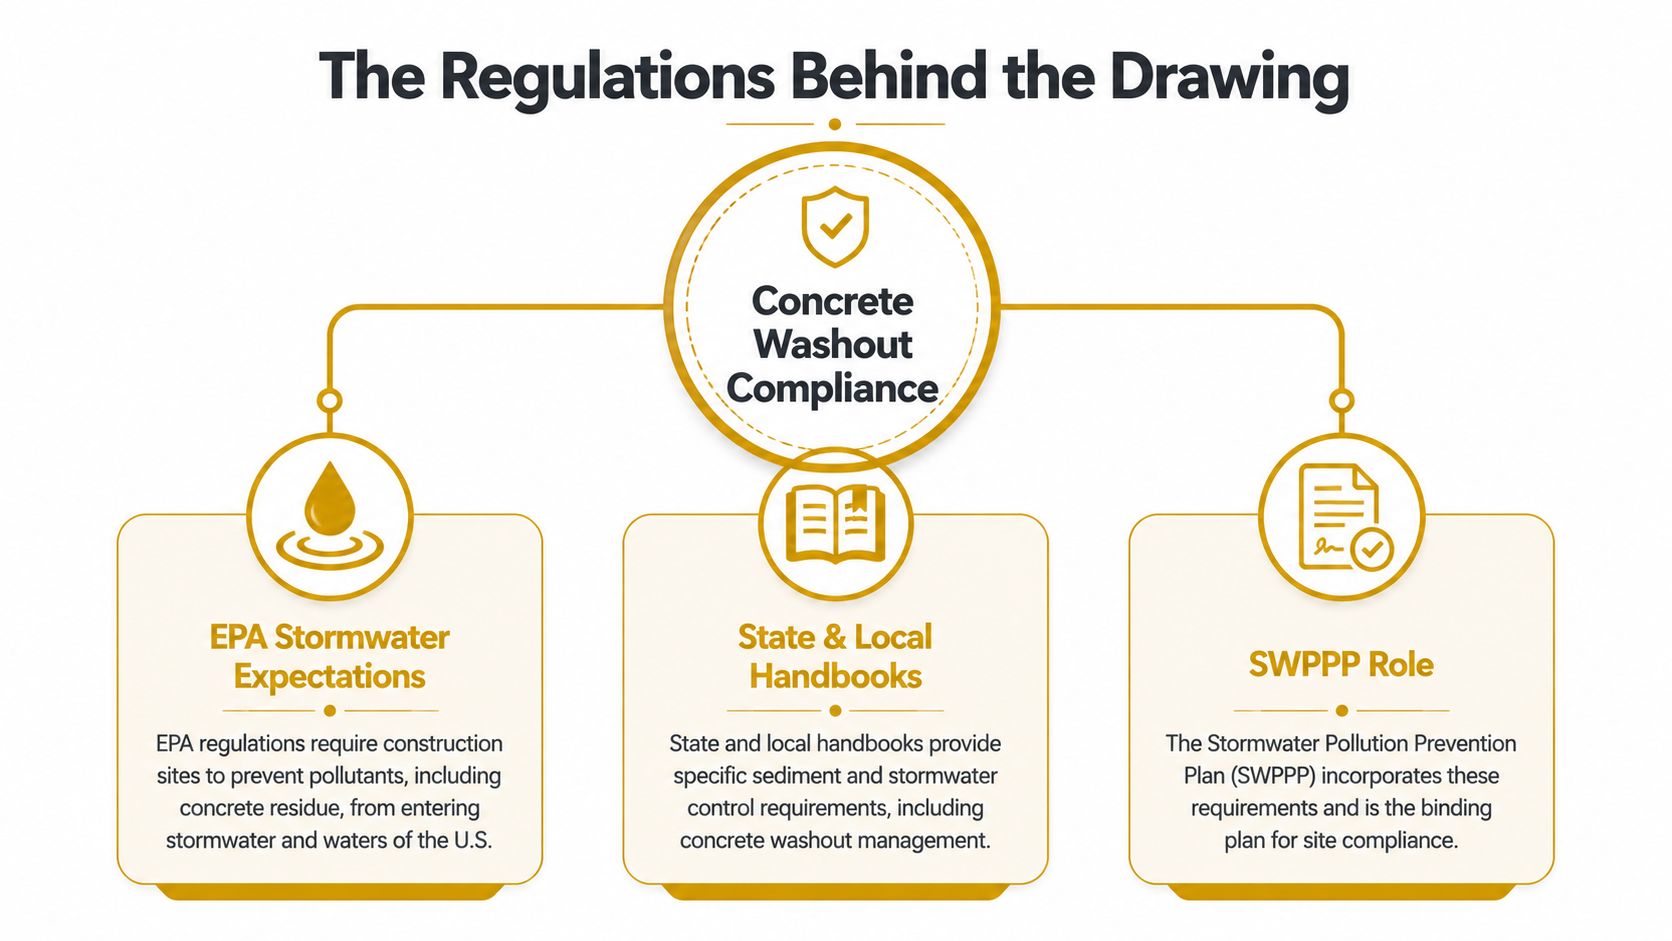
A concrete washout detail is not a housekeeping box on the plan set, it is a compliance device. The regulatory language looks abstract until you turn it into field duties. EPA guidance says the site has to keep all wash water and solids in leak-proof containers and recycle 100% of the collected material. State and local manuals then translate that requirement into layout, liner type, setbacks, and the inspection points the crew has to verify before the first truck rinses out (EPA BMP guidance).
Location is the first rule that matters in the field. The setup needs truck access, but it also needs enough separation from storm drains, open ditches, and waterbodies to keep runoff from reaching them during a rain event or a sloppy rinse. Public guidance commonly puts that setback at least 50 feet from those features, and that is the kind of number inspectors look for because it is easy to verify on site (EPA BMP guidance, IRMCA presentation).
What gets enforced
Inspectors usually start with the same items because they are the easiest to check and the ones that fail first. The washout has to appear in the SWPPP, show up on the site map, and match the way the narrative says it will be built. If the drawing calls for a lined pit and the crew sets an unlined hole beside the trailer, that mismatch is already a problem before anyone checks how full it is.
Capacity draws the next look. Public manuals commonly use 75% capacity as the point where the washout has to be vacuumed, evaporated, or removed so it does not overflow. Once the pit reaches that level, daily inspection stops being paperwork and becomes a field control the superintendent has to manage before the next rinseout or rain event (EPA BMP guidance, IRMCA presentation).
Field note: enforcement usually starts with a correction, then moves to a written notice, and it can escalate if the discharge risk stays open. On a bad day, that turns into a stop-work conversation fast.
Sizing the Washout for Real-World Volumes
A washout can look roomy on a plan sheet and still fail the minute a pump starts rinsing, a chute gets washed down, and the finishers begin dumping buckets. That is where sizing gets real. The pit has to handle the rinse water the crew makes, plus the mess that comes from working fast between trucks.
Public guidance gives practical minimums, and the numbers are not arbitrary. Delaware's handbook calls for prefabricated washout units at least 4 feet by 4 feet by 1 foot deep with a 4-mil polyethylene liner, while constructed washout areas must be at least 6 feet by 6 feet by 3 feet deep with a 10-mil liner, 2:1 side slopes, and a 1-foot berm (Delaware washout handbook). On larger jobs, some public manuals call for 10 feet by 10 feet minimum installations, which fits the reality of longer pours and more than one truck working the same space. The drawing should show the size that matches the pour, not the size that only looks neat on bid day.
Freeboard and capacity are not optional
Leave room above the slurry line. One planning standard calls for at least 10% freeboard so a rain event does not push the contents over the top (Orange County Public Works). Crews miss that point when they size only for rinse water and ignore what stormwater adds to the pit.
The other number that matters is the action point. Once a washout reaches 75% capacity, it should be vacuumed, allowed to evaporate, or removed before overflow becomes likely (EPA BMP guidance). That belongs on the drawing, the trailer checklist, and the inspection log. Waiting until the pit looks almost full is how slurry ends up on the grade.
| Type | Minimum Size | Liner | Side Slopes | Berm |
|---|---|---|---|---|
| Prefabricated unit | 4 ft x 4 ft x 1 ft | 4-mil polyethylene | Not specified in the benchmark | Not specified in the benchmark |
| Constructed pit | 6 ft x 6 ft x 3 ft | 10-mil | 2:1 | 1 ft |
| Larger site minimum | 10 ft x 10 ft | Varies by manual | Varies by manual | Varies by manual |
The right size is the one that survives the pour you actually have, not the one that looks tidy on a bid-day sketch.
What Belongs on the Actual Detail Drawing
A usable concrete washout detail is not just a box with a label. It should read like an installation instruction, because the superintendent, the finisher, and the inspector all need different information from the same sheet.
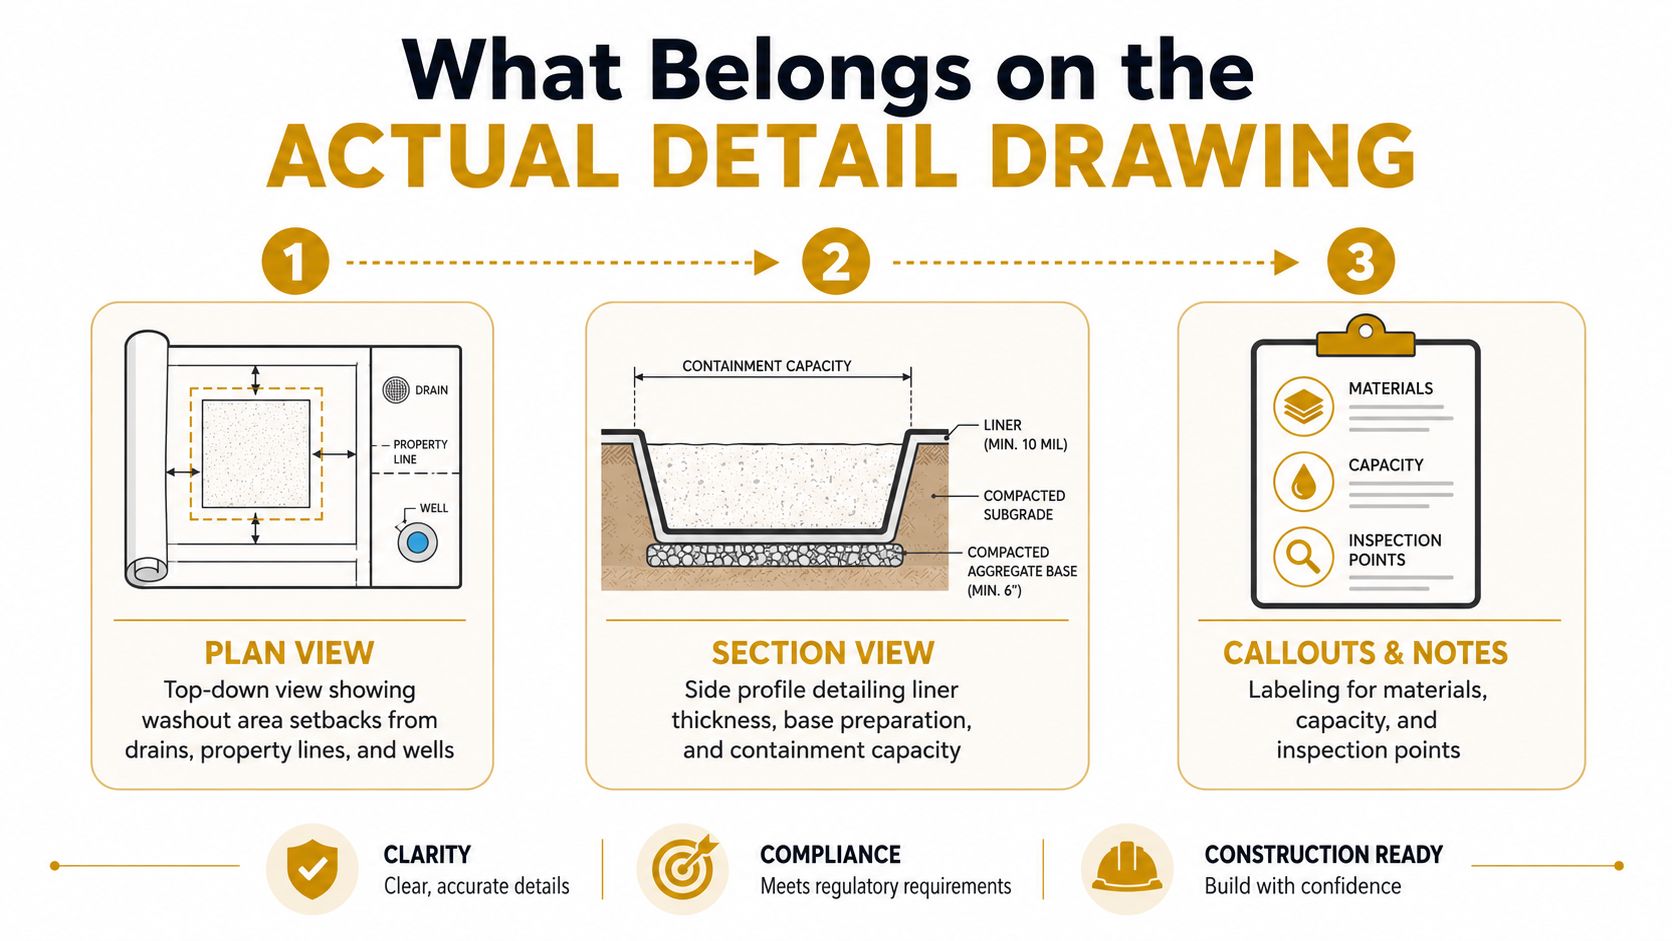
Start with the plan view. Show the washout area relative to storm drains, ditches, and waterbodies, and mark the 50-foot setback clearly so nobody has to estimate it in the field (EPA BMP guidance). If the site uses a prefabricated pan, show the pan footprint and the access route for the mixer or vacuum truck. If it is a constructed pit, show the berm lines, the liner extent, and the haul-out path.
The notes inspectors actually read
The section view is where a lot of drawings get thin. It should call out the liner thickness, side slopes, freeboard, and the method for keeping the liner from tearing during placement. Delaware's handbook gives you a workable benchmark, 10-mil liner, 2:1 side slopes, and a 1-foot berm for constructed washout areas (Delaware washout handbook).
The text notes matter too.
- Signage: Put a legible sign that says Concrete Washout.
- Access: Leave room for the boom truck and the vacuum truck.
- Weather cover: Show the cover or tarp arrangement for downtime and rain.
- Maintenance note: Tie the washout to the 75% capacity trigger and cleanup method.
If the SWPPP says one thing and the detail shows another, the inspector assumes the field will follow the weaker version.
A prefabricated pan fits a tighter footprint and is easy to swap when the pour is straightforward. A constructed pit makes more sense when the crew needs more working volume or expects repeated rinsing. Either way, the drawing should match the SWPPP narrative so the permit text and the field layout describe the same containment system.
Installing the Washout the Morning of the Pour
The fastest way to lose a clean setup is to install it wherever there happens to be open ground. I always want the crew to pick the spot first, then build around the truck path, not the other way around.
Start with stable ground that gives the mixer and vacuum truck room to reach the edge without rutting the access route. Keep the setback from drains and waterways, then clear the area of debris before the liner goes down. If it is a constructed pit, seat the liner smooth, build the berm, and patch any punctures before a single bucket of slurry goes in.
Field habits that keep the pit alive
The routine after that is simple, but crews still get lazy with it. Use the minimum amount of water possible, empty chutes and hoppers at the pour instead of rinsing them back at the truck rack, and avoid back-flushing unless it is an emergency (IRMCA washout presentation). That keeps the washout from filling with extra water that nobody budgeted for and nobody wants to haul off twice.
A quick leak check is worth the small delay. Add a little water, watch for seepage, and confirm the liner is seated before the pour pressure starts. If the site is large, multiple washout points are smarter than forcing every truck to cross the project just to dump rinse water (EPA BMP guidance).
Practical rule: if a finisher can't find the washout in under a minute, the sign is too small, the route is unclear, or the location is wrong.
Daily and post-rain inspections should record the visible capacity, liner condition, and whether the standing liquid looks clean or contaminated. Once the washout crosses the 75% capacity line, it gets serviced, not watched.
Inspections, SWPPP Documentation, and Emptying the Pit
A washout can look fine in the field and still get marked up if the SWPPP file and the site setup do not line up. The narrative should spell out where the washout sits, what it is built from, who is responsible for checking it, and how it gets handled when it fills. The site map needs the same location, not a generic symbol parked near the trailer because there happened to be room for it.
Inspectors and SWPPP consultants usually start with the same basics. They want to see the washout kept at least 50 feet from drains and waterbodies, the liner in good shape, the sign readable, and the fill level under the 75% capacity service limit. If one of those pieces is weak, the rest of the discussion usually tightens up fast.
What happens when it is full
Once the pit hits that trigger, the next move is service. Vacuum service works when liquid is the main issue, on-site evaporation can work when weather and schedule cooperate, and hardened solids should be removed for recycling or proper disposal after the slurry has set (EPA BMP guidance, Delaware washout handbook).
Some projects need a tighter hand on the discharge side. Guidance used by site teams notes that untreated washwater may be treated as hazardous liquid waste if it leaves the site, and that neutralizing the high pH after solids separation can help bring the water into the right range (Orange County Public Works). That is not a casual field step, but it matters on jobs where the discharge limits are strict and the inspector is looking closely at how the water is being handled.
The inspection log should show who checked it, when it was checked, and what was done. That record is what keeps a small problem from turning into a bigger conversation with the agency.
Renting a Washout Pan and Planning the Logistics
A rented pan makes sense when the pour is temporary, the footprint is tight, or the crew wants a clean swap instead of building and breaking down a pit. Building on site still has a place for larger, repeated pours, but a prefabricated pan is often the easier move when the schedule is short and the access route is already crowded.
Reborn Rentals is one option for concrete washout pans and lids for rent with delivery, and that kind of setup is useful when the team wants to match capacity to the pour instead of committing labor to a custom build. The usual rental workflow is simple, pick the dates, confirm the delivery spot, make sure the truck can get in and out, and plan the swap before the pan nears capacity. Some rental pans are listed in the 72-inch by 72-inch class with capacities around 310 gallons and 441 gallons, which gives crews a practical starting point for matching the pan to the truck count and pump size on the job.
What to confirm before the truck rolls
- Delivery access: Verify the truck can reach the drop point without tearing up the site.
- Dates and location: Lock the schedule early so the pan arrives before the pour.
- Terrain conditions: Rough ground can change how the setup gets placed and may add logistics complexity.
- Swap plan: Know who calls for pickup before the pan gets too full.
A rented pan is the better call when you want speed and predictability. A custom pit still wins when the project is larger, the pours are repetitive, or the SWPPP already calls for a built containment area that stays in place for the duration.
If you need a washout setup that shows up ready for the pour, Reborn Rentals keeps the rental side straightforward with washout pans and lids delivered to the jobsite. Visit Reborn Rentals to line up a container that fits your access, your pour size, and your cleanup plan before the first truck backs in.