The pour is done. The last truck is idling out, the pump crew is coiling hose, and now the messy part starts.
There’s still slurry in the hopper. The chutes need to be rinsed. Hand tools, buggy trays, screeds, and boots all carry cement paste that can’t just be knocked off anywhere. This is the point where a clean job stays clean, or the site starts wearing the mistake for the rest of the week.
A lot of project managers learn washout the hard way. They focus on mix timing, access, finish schedule, and labor coverage, then treat cleanup like an afterthought. That’s backwards. If the washout plan isn’t set before the first truck shows up, the crew will improvise. Improvised washout usually means slurry on stone, gray runoff toward an inlet, and a superintendent trying to explain why there’s a caustic puddle next to active work.
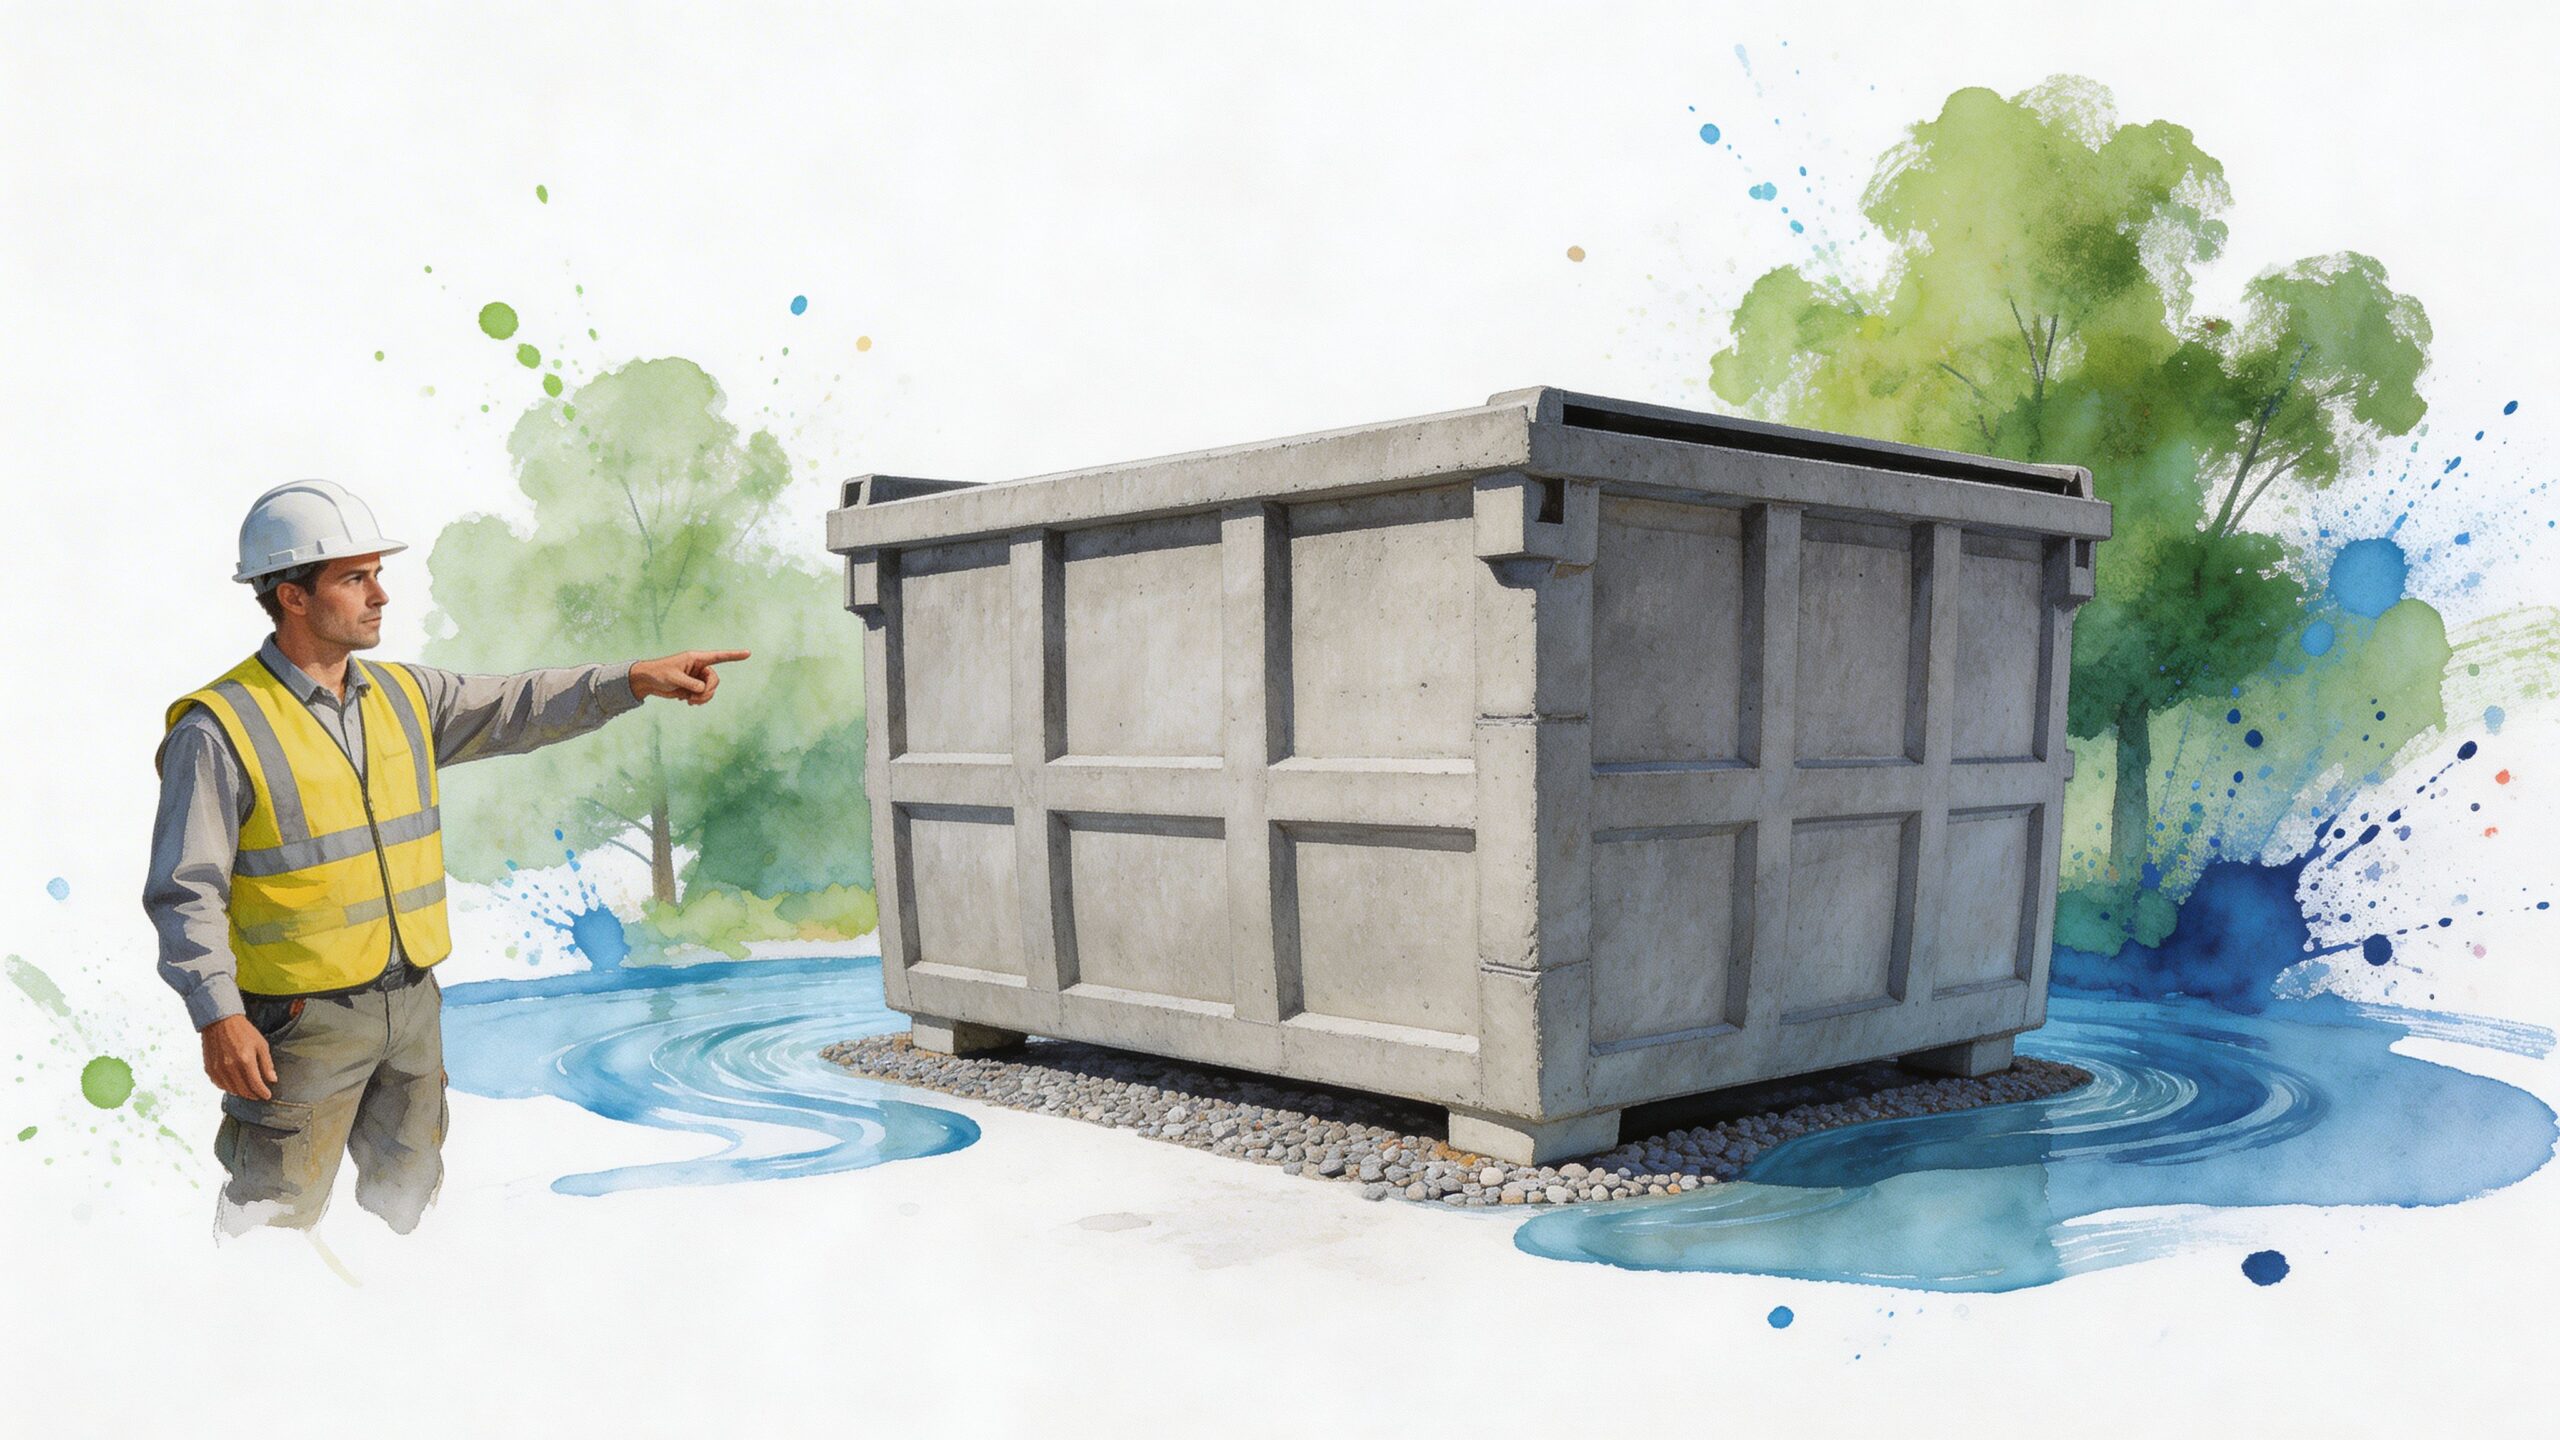
That’s why a concrete washout dumpster matters. It isn’t just a steel box parked near the pour. It’s the control point for the whole cleanup cycle. It gives the crew one place to wash out equipment, one place to contain solids and liquid, one place to inspect, and one place to service when it’s time to haul off.
The market size tells you this isn’t a niche problem. The global market for construction portable concrete washout containers reached USD 785 million in 2024, according to Growth Market Reports on construction portable concrete washout containers. That kind of demand comes from one simple reality. Every active concrete site needs a repeatable way to contain washwater and hardened waste without gambling on a liner, a dirt pit, or someone’s memory.
The Moment After the Pour An Introduction
After a slab pour, everyone wants to move on fast. Finishers are checking edges. Laborers are stripping temporary protection. The pump operator wants a place to clean out without dragging hose half the length of the site.
That’s when the washout area either works like a laydown yard or fails like an open tailgate on the highway. If it’s close enough, visible, stable, and sized right, the crew uses it. If it’s too far away, too small, or buried behind materials, people start rinsing where it’s convenient.
What the crew needs in that moment
A washout setup has to do three things well:
- Take the abuse: Wet concrete, rebar scraps, wheelbarrows, and pump washout aren’t gentle.
- Hold liquid without leaking: Slurry doesn’t stay where you “sort of” contain it.
- Stay simple under pressure: End-of-pour cleanup happens when people are tired and the light may be fading.
On a real site, the best system is usually the one that removes decisions. Chute goes here. Hopper washout goes here. Hand tools go here. Once that’s clear, compliance gets easier because the crew isn’t guessing.
The dumpster is part of the workflow
A good concrete washout dumpster does more than catch waste. It shapes traffic and timing on the site.
Set it in the wrong place and trucks back up where you don’t want them. Set it too near an active path and it becomes one more obstacle around the pour. Set it where service access is poor and swapping it out turns into a production problem.
A washout area should work like a gang box. Everyone knows where it is, what goes in it, and who’s responsible for it.
The best project managers treat washout as part of pre-pour logistics, not post-pour cleanup. That means deciding placement, service timing, site access, and final disposal before the first load is discharged.
Why Washout Containment Is Non-Negotiable
The pour is done, the crew is tired, and somebody wants to rinse out fast before the mud sets up in the chute. That is the point where a clean job either stays under control or starts creating a paperwork problem.
Concrete washout is a high-pH slurry. If it gets loose, it can burn vegetation, stain paved surfaces, and move into drains or exposed soil with the next rain. On a site, it needs the same level of discipline as fuel, curing compounds, or any other material that can leave the work area and create liability.
Why this material creates trouble fast
As noted earlier, concrete washwater can reach a caustic pH. That matters because the problem rarely starts with a dramatic spill. It usually starts with a small shortcut that looks harmless in the moment.
A driver rinses onto the subgrade. A pump crew washes tools beside the setup area. Rain comes through that night, picks up the residue, and carries it to the low point. By morning, what looked like a minor cleanup issue has turned into runoff, staining, or an inspector question nobody wants to answer.
Gravity does not care what the plan was.
Containment supports compliance, service, and final disposal
A washout dumpster is more than a place to dump slurry. It is the control point for the whole washout process. It keeps liquids and solids in one managed location, gives the hauler a defined pickup item, and makes final disposal or recycling possible because the material has stayed separated from trash and soil.
That full chain matters. Once washout is mixed with general debris or spread across the ground, cleanup gets slower, hauling gets messier, and disposal options usually get worse. A contained load is easier to document, easier to remove, and easier to direct into the right downstream handling stream.
The record from Diligent in south Florida shows what that looks like at scale. From 2017 to 2020, the company collected 63,823 tons of concrete washout waste across eight counties and achieved 100% recycling, according to the University of Florida life cycle assessment summary in Diligent’s report. Of that total, 22,063 tons went to aggregate crushing facilities and 41,760 tons went to lake fill applications. The report also cites 5,649 metric tons of CO2 equivalent offset and 55,023,364 megajoules of energy saved.
That result starts on the job site, not at the recycling yard.
Practical rule: If the crew cannot point to one approved washout location as soon as the pour ends, the site is set up for spills, rework, and preventable fines.
What usually fails in the field
Bad washout control follows a familiar pattern. The site has a plan on paper, but the setup breaks down under production pressure.
- Ground washout near the pour: Quick for five minutes, expensive for the next two days.
- Improvised boxes with damaged liners: They hold until one corner tears or the box shifts under load.
- Washout areas blocked by pallets, rebar, or parked equipment: Crews take the shorter path every time.
- Unserviced containers filled past a safe working level: Overflow turns a containment system into a spreading problem.
The common issue is simple. The system stops being usable before the work stops.
What holds up on a real project
The setups that work are boring in the best way. They are visible, watertight, easy to reach, and tied to a pickup plan before the container is close to full.
| What works | Why it holds up on a real job |
|---|---|
| Dedicated watertight container | Keeps slurry contained and off the ground |
| Placement that matches truck and pump access | Reduces off-plan rinsing and wasted time |
| Clear crew direction | Removes guesswork at the end of the pour |
| Scheduled pickup or swap-out | Prevents overflow and keeps disposal on track |
A clean washout area tells inspectors, owners, and your own crews that the site is being run with discipline. It also saves money in places project teams tend to overlook at bid time, including labor for cleanup, surface repair, extra hauling, and delay tied to failed inspections.
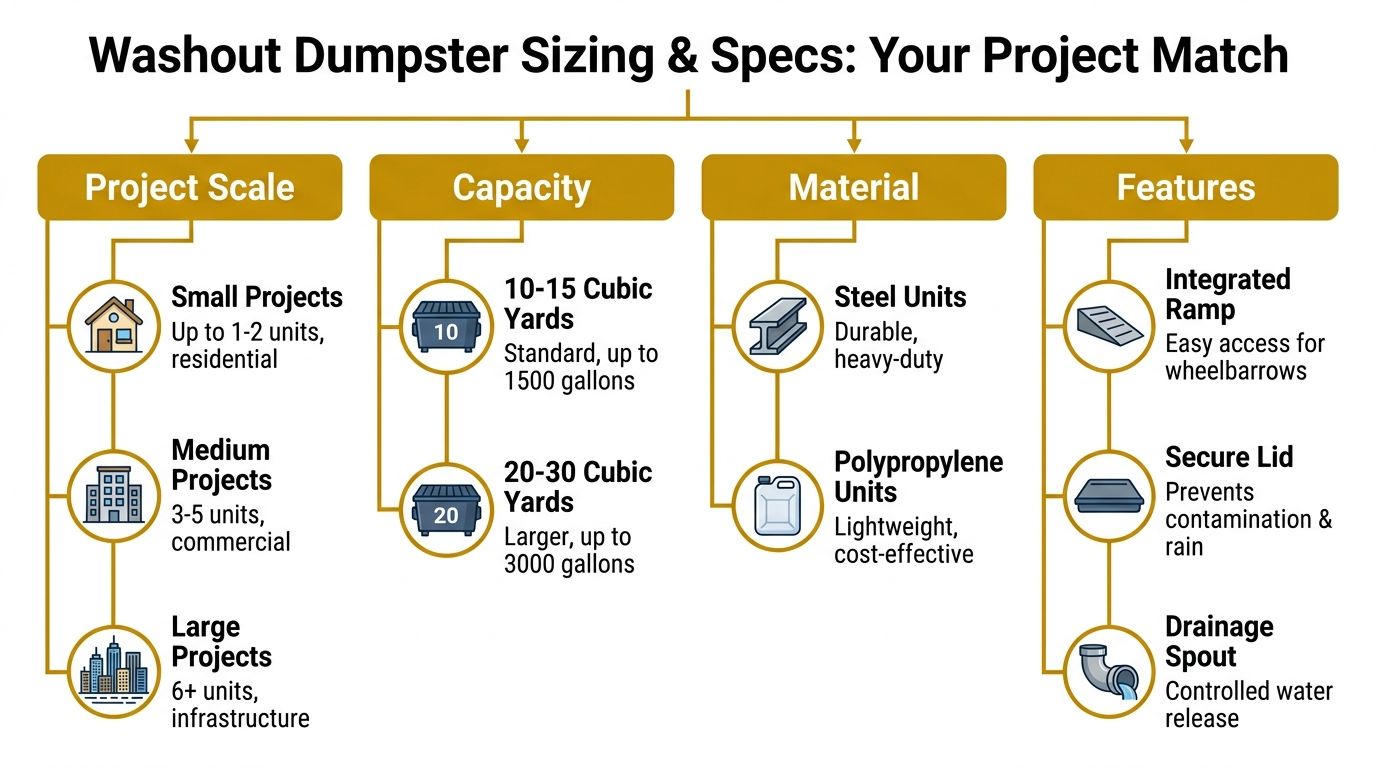
Understanding Washout Dumpster Sizing and Specifications
A spec sheet only helps if you know how it translates to field conditions. Steel thickness, cross members, liquid capacity, hinge design, and coatings all sound technical until you’re standing next to a loaded pan after a long pour. Then those details become very real.
What the build tells you
Super Duty washout dumpsters are built with 1/4-inch thick floors and cross members at 12-inch centers to handle wet concrete loads exceeding 18 tons, according to the CWPM concrete washout container spec sheet. That tells you the container is designed for repeated heavy loading, not light-duty debris.
If you’ve ever seen a pan flex under weight, you already know why this matters. Wet concrete doesn’t load like cardboard or wood scrap. It stays heavy, it shifts, and it keeps pressure on the floor and seams.
The same spec sheet notes that some models use non-stick coatings that support over 95% solids separation for recycling. That matters because hardened buildup slows service, adds labor, and shortens the useful life of the container.
Reading dimensions like a superintendent
Dimensions aren’t just catalog data. They tell you whether the unit fits the work and the site.
A larger pan can hold a substantial amount of material, including many tons of waste and hundreds of gallons of liquid. A shallower unit will hold less liquid and solids. For a project manager, that translates into two simple questions:
- Can the unit physically sit where the crew needs it?
- Can it handle the washout volume before service becomes urgent?
A shallow unit may be easier to access for some tasks. A deeper unit gives you more room for solids and liquid, but it may need more thought on placement and approach.
If the pan is too small, the crew notices at the worst possible time. Usually with a chute still dripping and nowhere left to go.
Features that matter in the field
Some features look minor in a product listing and turn out to be the whole game on site.
- Watertight seals and closures: If slurry leaks from seams or gates, the container failed its main job.
- Forklift or equipment-friendly handling points: These matter when the site is tight and the unit has to be placed precisely.
- Release coating: Less sticking means faster cleanup and better recycling downstream.
- Heavy floor construction: This helps when the crew drops chunks, drags tools, or loads the pan unevenly.
A concrete washout dumpster should be judged the same way you judge formwork or shoring. Don’t ask whether it can survive one careful use. Ask whether it can survive normal jobsite behavior.
How to Choose the Right Washout Unit for Your Project
Choosing the right unit starts with the work, not the catalog. The mistake is ordering a container by habit. The right approach is to match the container to the pour sequence, crew behavior, and site constraints.

Start with the actual washout points
Think through where washout will happen, not where you wish it would happen.
Ask these questions before you book anything:
- How many trucks will discharge and wash chutes at this location?
- Will a pump be used, and where will hopper washout occur?
- Is this a one-day event or repeated pours over several phases?
- Can haul and pickup equipment reach the unit without crossing active operations?
- Will rain collect in the container if it sits for several days?
One useful field benchmark is to size for typical volumes from truck chutes and pumps, allow for rainfall freeboard, and ensure adequate distance from storm drains where standards apply. Even if your local rule differs, that’s a practical way to think about reserve capacity and placement.
Compare the options
Project teams usually weigh three broad approaches:
| Option | Where it can make sense | Where it goes wrong |
|---|---|---|
| Portable washout dumpster | Repeated pours, tight compliance controls, urban jobs, fast cleanup | Wrong size, poor placement, delayed service |
| Lined washout area | Sites with room and good supervision | Tears, overflow, muddy access, inconsistent use |
| Burial where permitted | Very limited cases with favorable site conditions and clear rules | Hidden documentation, verification, and liability issues |
Minnesota guidance allows burial of up to 0.5 cubic yards of concrete solids in some cases if the material is placed at least two feet below the surface and outside the groundwater table, according to the Minnesota PCA washout guidance. The bigger issue isn’t whether burial is allowed somewhere. It’s that the full cost is often misunderstood.
The trade-off often overlooked
Burial can look cheaper because the container invoice is visible and the hidden site costs are not. Once you factor in soil testing, excavation, burial verification, documentation, and the risk of revisiting the issue later, the picture changes.
Soil testing can incur significant costs in this decision context, and contractors rarely get a clear break-even analysis. That’s why good project managers don’t compare only line-item rental cost to “free disposal.” They compare controlled, documented containment against a method that can create follow-up work and uncertainty.
The cheapest-looking washout plan on bid day often becomes the most expensive one after the second pour.
Pick the unit the way you’d pick dewatering or traffic control. Match it to the risk, not just the purchase order.
Navigating Rental Logistics and Transparent Pricing
Rental logistics should be boring. That’s a compliment. If ordering a washout unit feels complicated, the process is already wasting field time.
The best rental flow mirrors how a superintendent thinks. First, choose the unit. Next, enter the dates and job location. Then confirm delivery and pickup details. A simple Cart → Details → Checkout sequence works because it follows the order of decisions the field team makes.
What to confirm before delivery
Before you finalize any rental, pin down the points that usually create confusion later:
- Placement access: Is the route stable, clear, and wide enough for delivery equipment?
- Ground condition: Mud, slope, and rough terrain can affect where the unit can be set.
- Service expectations: Know how pickup, swap-out, or final haul-off will be requested.
- Date realism: Don’t book around the ideal schedule only. Book around the likely one.
A washout unit delivered to the wrong side of the site is like a rebar shipment unloaded behind the wrong gate. The material arrived, but the operation still slows down.
What transparent pricing should look like
Good pricing is upfront about the base rate and honest about variables. In this category, daily pricing can start at a competitive rate, based on published information. That number helps with budgeting, but it’s not the whole story on every job.
Additional charges may apply for things like:
- Delivery distance
- Rough terrain placement
- Express orders
- Special handling based on access or timing
None of those are suspicious on their own. What matters is whether the rental provider spells them out before the truck rolls.
The clean handoff matters
A washout rental should include clear responsibility for who does what on site.
One team needs to know:
- Where the unit goes
- Who directs placement
- Who watches fill level
- Who calls for service
- What must stay out of the container
That last point matters more than people think. Washout containers are for concrete-related material. Once crews start tossing general trash, packaging, or other contaminants into the unit, disposal gets harder and accountability gets fuzzy.
The goal is simple. You want a rental process that’s easy to order, easy to explain to the crew, and easy to close out without a billing argument at the end of the month.
On-Site Best Practices for Safe and Compliant Use
Once the concrete washout dumpster lands on site, the job is to make it easy to use correctly every time.
Placement makes or breaks compliance
The best container in the world won’t save a bad location.
Use this field checklist:
- Pick stable ground: Soft or rutted placement areas create tipping, access, and cleanup problems.
- Keep access direct: The pump crew and truck drivers should be able to reach the unit without weaving through stored material.
- Respect setbacks: Some guidance calls for siting a specific distance from storm drains, and local rules may be stricter depending on jurisdiction.
- Make it visible: If operators can’t see it easily, they’re more likely to improvise.
A washout area should sit where the work naturally flows. If people have to detour, they’ll start negotiating with the rule.
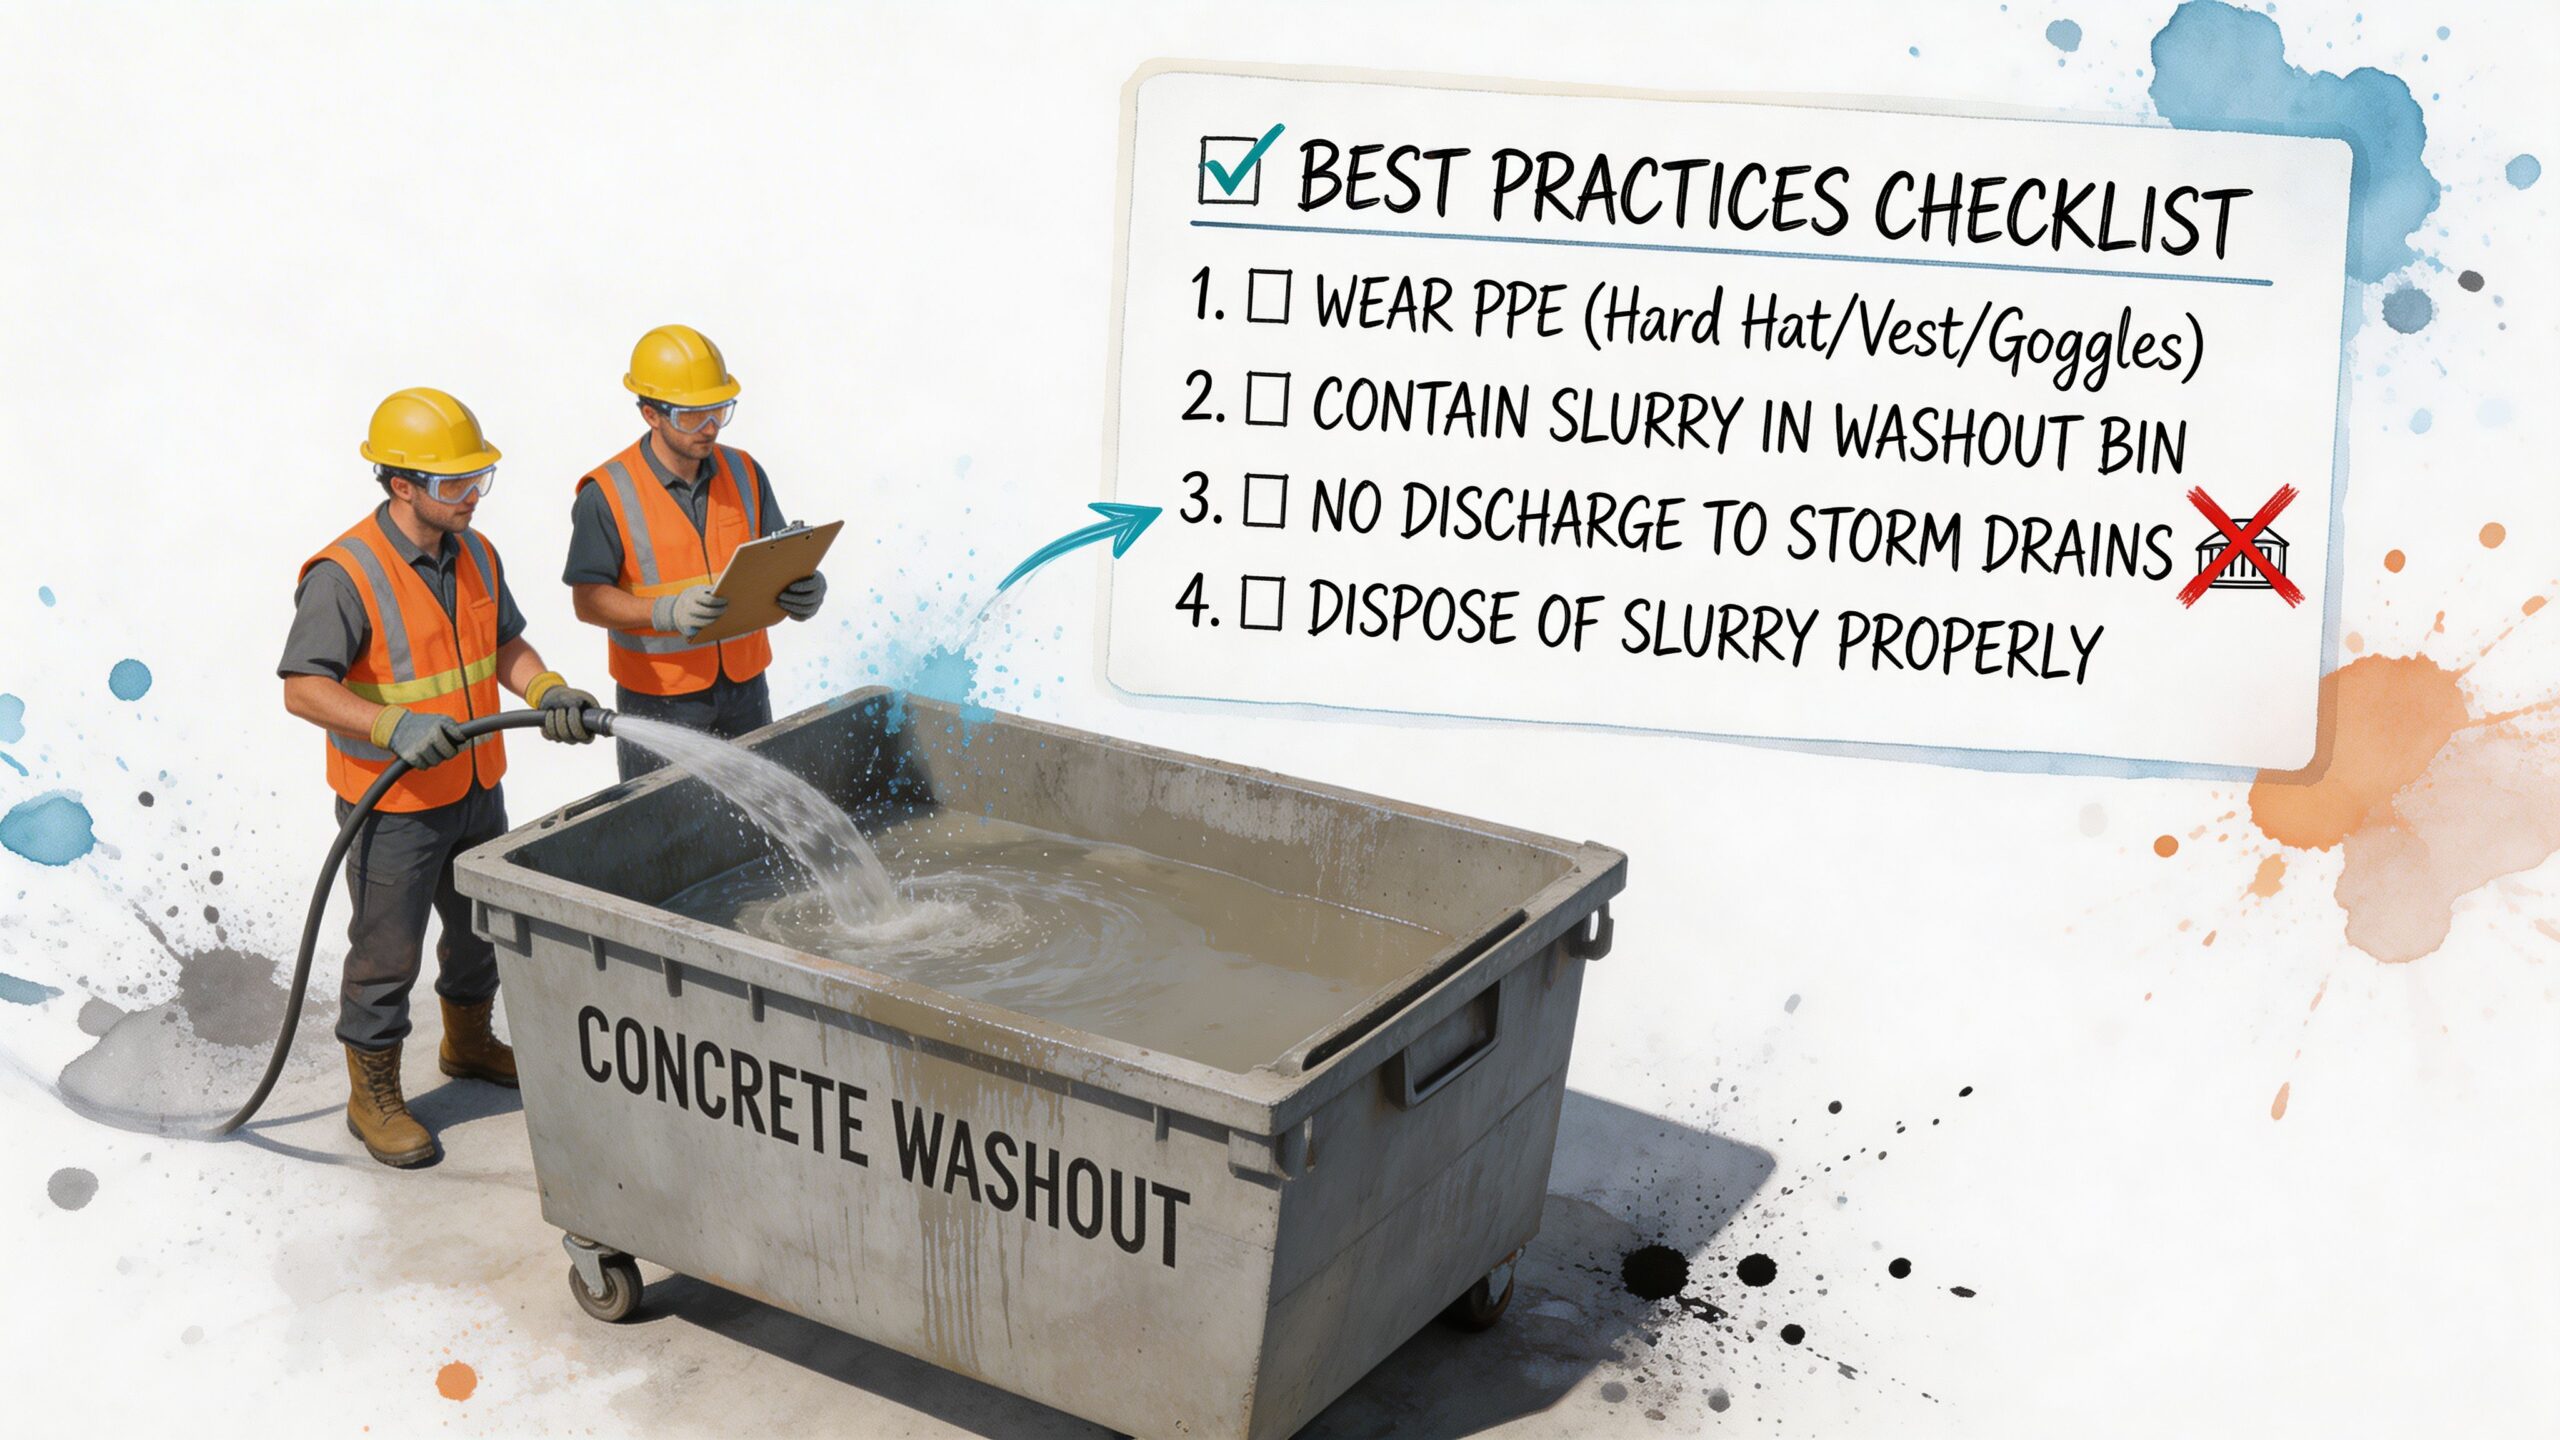
Daily use habits that keep the area under control
Most washout failures are operational, not structural. The box was there. People just didn’t manage it.
Train the crew to follow a short routine:
- Wash into the container only: No side rinsing on stone or pavement.
- Watch freeboard: Leave room for liquid, solids, and weather.
- Keep the perimeter clean: Shovel or scrape around the unit before buildup spreads.
- Separate unrelated waste: Don’t use the pan as a general trash can.
Wet concrete behaves like mud with a memory. If you let it spread early, you’ll still be dealing with the outline later.
This is also where a lead laborer earns their keep. One person assigned to watch the washout area during active pours can prevent a lot of cleanup and a lot of arguing.
A quick visual on field handling helps reinforce the routine:
Know when to service it
Don’t wait until the unit is practically crowned over with solids or carrying too much liquid. Service timing should be planned around the pour schedule, not requested in a panic after the crew has already lost use of the container.
Watch for these signs:
| Sign on site | What it usually means |
|---|---|
| Washout is nearing the top working zone | Schedule pickup or swap-out now |
| Rain is forecast and freeboard is tight | Service before weather hits |
| Multiple pours are queued back to back | Add capacity or pre-book a replacement |
| Material is splashing during normal use | The container is too full or being used poorly |
Good washout discipline feels a lot like good housekeeping. It isn’t flashy, but it keeps the whole site safer and easier to run.
Closing the Loop The Lifecycle of Washout Waste
A full container isn’t the end of the process. It’s the handoff point.
Once washout waste leaves the site through a proper service channel, the solids and liquids can be managed as materials instead of as a mess. Hardened concrete solids may be crushed and reused in applications such as aggregate or structural fill. Washwater can be treated so its pH is brought under control before disposal or reuse, depending on the handling system.
That’s the part many crews never see, but it matters. A concrete washout dumpster only does its full job when it connects site containment to downstream processing. Otherwise, you’ve just moved the problem from one location to another.
Why the full lifecycle matters
Containment, pickup, recycling, and documentation belong to the same system.
- Containment on site keeps slurry out of soil and drains.
- Controlled hauling keeps the waste stream separated.
- Processing after pickup creates a path for reuse where feasible.
- Documentation gives the project team something defensible if questions come up later.
A washout container is like a rebar chair. Small item, big consequence. If it does its job, the whole assembly performs better.
The best teams think past the pour. They don’t just ask where the slurry goes today. They ask whether the plan still makes sense at pickup, at inspection, and at closeout.
Frequently Asked Questions from Site Managers
Site managers usually ask the same thing after the first few pours. Who owns the washout plan when field conditions change. The short answer is the project team does, and the container only works if the process around it works too.
What if local rules conflict with each other
That happens on regional work all the time. One jurisdiction may allow a lined ground-level washout in a temporary location, while another expects a watertight container with different setback rules and inspection expectations. Dane County’s guidance is one example, and the county publishes its concrete washout requirements here: Dane County concrete washout guidance.
Do not run this off memory. Build a project-specific washout sheet before mobilization. Include the approved container type, placement limits, liner or cover requirements, service trigger, and final disposal path. A five-minute pre-pour review saves a lot more time than arguing with an inspector after slurry gets where it should not be.
What if someone dumps fuel, oil, or another contaminant into the washout dumpster
Treat it like a contaminated waste incident. Stop using the unit. Keep other crews out of it. Notify the superintendent, environmental lead, and the hauler or disposal provider so the next step is documented and the waste stream is handled correctly.
One bad dump changes the whole job. Concrete washout is usually manageable if it stays separate. Mix in petroleum or another contaminant and the pickup, disposal cost, and paperwork can change fast.
How do you handle washout during heavy rain
Rain tests whether the plan was real or just something written on a site map.
Keep freeboard in the container, check the unit before forecasted storms, and call for service early if the liquid level is already high. If the washout area ponds, crews will start improvising, and that is how slurry ends up tracking across the site or washing toward inlets. Weather planning is part of washout management, not a separate issue.
What about freezing weather
Cold weather creates different failure points. Access gets slick, residue hardens around the approach, and crews rush cleanup because nobody wants to stand over a washout box in the wind.
Keep the route to the unit scraped and usable. Place it where a truck can still reach it after snow or ice. Check the area for trip hazards and frozen buildup. Winter pours need a tighter service plan because missed pickups are harder to recover from once material starts freezing in place.
Can one concrete washout dumpster serve the whole site
Sometimes, on a tight site with one active concrete crew and a short walking distance. On a spread-out project, one unit often looks efficient on paper and fails in the field. If the washout point is too far from the pump, the curb crew, or the finishing area, people start rinsing wherever they can.
Use enough control points to match the work. That may mean one central dumpster plus a second unit for a distant phase, or a temporary relocation as the job moves. The right setup is the one crews will use, the hauler can service without delay, and the project team can defend during inspection.
If your site needs a washout setup that’s easy to book, clearly priced, and built for real field use, Reborn Rentals gives contractors a straightforward way to schedule containment equipment, set dates and delivery details, and keep concrete cleanup under control from pour day through pickup.