You’re dealing with this problem after the job has already started.
A project manager orders what sounds like a reasonable dumpster, the crew starts demo, and by the third day the container is heaped up, the site is tightening, and everyone is asking the same question: do we swap it, add another one, or keep piling debris where it doesn’t belong? That’s how a simple rental decision turns into a schedule problem.
The size of construction dumpsters isn’t a side detail. It affects labor flow, haul frequency, truck access, compliance, and how clean the site stays when trades are working on top of each other. If the dumpster is too small, the crew wastes time walking debris farther, waiting on a haul, or reshuffling material. If it’s too large, you’ve tied up space you may need for deliveries, equipment, or staging.
For concrete work, there’s another layer. A lot of teams size the roll-off for broken forms, packaging, and general debris, then realize too late that washout is a separate containment issue. That mistake doesn’t clutter the job. It creates compliance trouble.
Choosing Your Dumpster Size Is More Than a Guess
A bad dumpster call looks small at first.
A PM sees a moderate renovation, figures a mid-size bin should cover it, and moves on to bigger decisions. Then the old finishes come out, framing gets opened up, and the waste stream turns out heavier and bulkier than expected. The container fills fast, loose debris starts collecting around it, and the crew loses a clean loading path.
That’s the point where costs stop being theoretical. The laborers spend more time handling trash twice. The hauler has to be called sooner than planned. If the dumpster sits in a tight access lane, every delay ripples into material deliveries and trade coordination.
Practical rule: Dumpster sizing should be treated like material staging. If you get it wrong, the whole site feels it.
This gets worse on jobs where people only think in volume. They ask, “How much space do we need?” but skip the more useful questions. What kind of debris is coming out? How dense is it? How fast will it be generated? Where will the truck sit when it drops or swaps the box?
The mistake I see most often is treating every remodel like the last one. A clean drywall renovation behaves one way. An older building with plaster, concrete, masonry, and odd tear-out behaves another way entirely. If your estimate ignores that difference, the dumpster will be wrong before the truck even arrives.
The crews that stay ahead of this don’t guess. They match container size to the debris stream, plan for swap timing, and keep separate containment in mind when concrete is involved. That’s what keeps a job moving.
Decoding Dumpster Dimensions and Volumes
Crews lose money when they order by label instead of by footprint and fill rate. A 20-yard box sounds simple on paper, but on site the question is more practical. How much debris fits before the walls choke off loading, and can the truck place that container without disrupting access?
A cubic yard is only a volume measure. Field conditions decide whether that volume is usable. Broken framing, cabinet carcasses, drywall, roofing, and concrete chunks do not stack neatly, and concrete washout equipment or containment berms can take up the same staging area you planned for the dumpster.
What cubic yards mean on a job site
Volume matters, but wall height and box length affect production just as much.
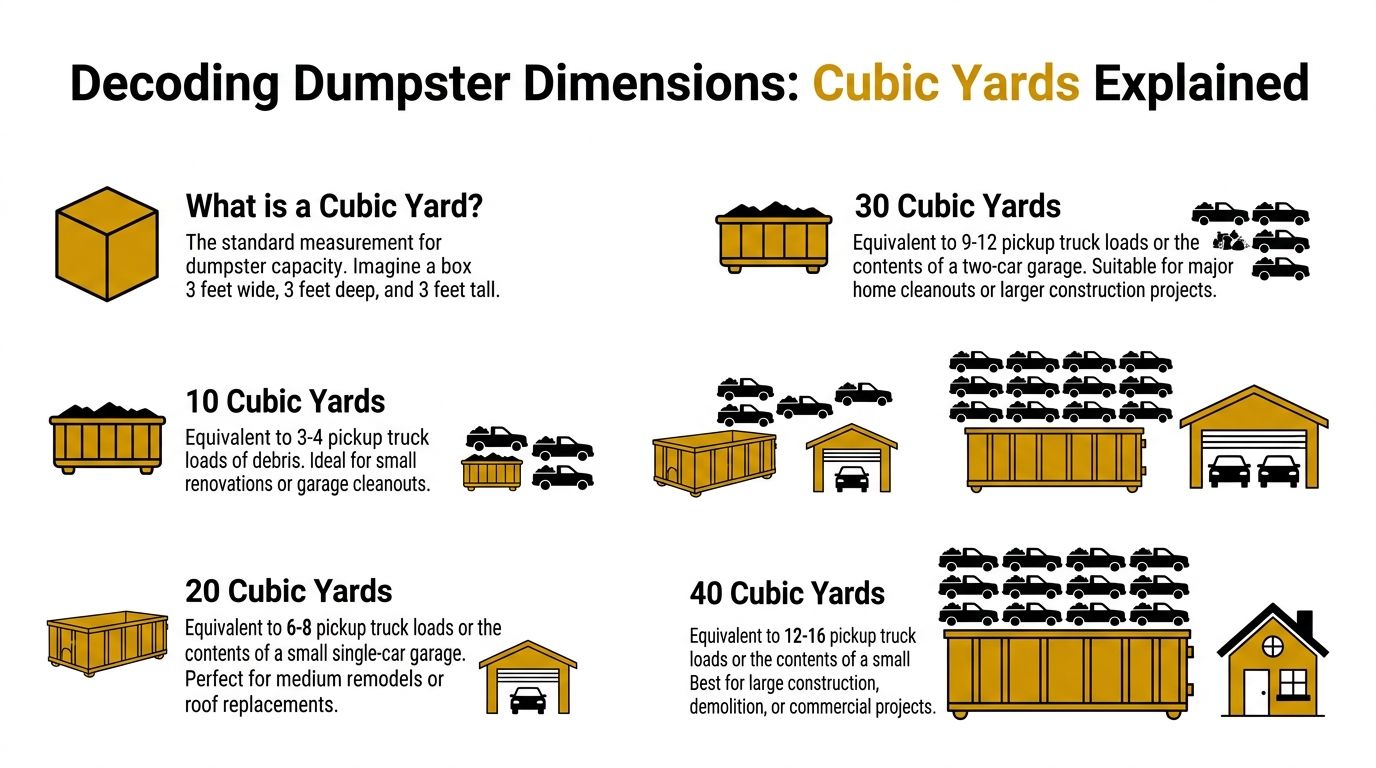
A 10-yard dumpster is usually the safest choice for dense debris. It commonly measures about 12 ft x 8 ft x 4 ft and holds about a few pickup truck loads. It works well for small interior demo, masonry cleanup, and concrete-related work where the material gets heavy long before the box looks full.
A 20-yard dumpster is the standard middle option on many remodels. Typical dimensions run about 22 ft x 8 ft x 4.5 ft, with room for several pickup truck loads. It gives a crew enough volume for flooring, roofing tear-off, drywall, and mixed renovation debris without the taller sidewalls that slow hand loading.
A 30-yard dumpster is usually around 22 ft x 8 ft x 6 ft and holds about a good number of pickup truck loads. This size makes sense when bulky debris is coming off steadily and you want fewer haul-offs, but it asks for more clearance and more deliberate loading because the walls are higher.
A 40-yard dumpster is commonly about 22 ft x 8 ft x 8 ft and holds about 12 pickup truck loads according to size references published by WM and other national haulers (roll-off dumpster size guide). It fits large demolition, commercial cleanouts, and new construction cleanup where the debris is bulky enough to justify the extra volume.
Standard Construction Dumpster Sizes at a Glance
| Size (Cubic Yards) | Typical Dimensions (L x W x H) | Capacity (Pickup Truck Loads) | Best For |
|---|---|---|---|
| 10 | 12 ft x 8 ft x 4 ft | a few | Small remodels, concrete-heavy cleanouts, dense debris |
| 20 | 22 ft x 8 ft x 4.5 ft | several | Roofing, flooring, medium renovations |
| 30 | 22 ft x 8 ft x 6 ft | a good number | New construction, major remodels, bulky mixed debris |
| 40 | 22 ft x 8 ft x 8 ft | a significant number | Large demolition, commercial cleanouts, high-volume debris |
Why the physical dimensions matter
The cubic-yard rating tells you capacity. The dimensions tell you whether the container will work on your site.
Widths stay fairly consistent because roll-offs have to travel legally and fit standard trucks. Length and height are where the trade-offs show up. A 10-yard box is easier for laborers to load by hand. A 30-yard or 40-yard box cuts swap frequency, but the taller walls can slow cleanup if the crew is carrying debris instead of using equipment.
Site layout changes the call too. On a concrete job, the dumpster cannot be planned in isolation. Washout containment, pump access, chute locations, and stormwater controls all compete for the same pad space. If the roll-off blocks the washout area, or the washout setup crowds the swing path for the truck, the site pays for it in delays and extra handling.
A dumpster that matches the debris but fights the layout is still the wrong size.
That is why experienced supers check three things together. Box volume, actual dimensions, and what else has to live in that staging zone.
How to Choose the Right Dumpster for Your Project
Most dumpster mistakes happen because someone sizes from the project title instead of the debris itself.
“Kitchen remodel” sounds simple. So does “bathroom gut.” But two jobs with the same label can produce very different waste depending on finishes, substrate, framing changes, age of the building, and whether concrete work is mixed in.
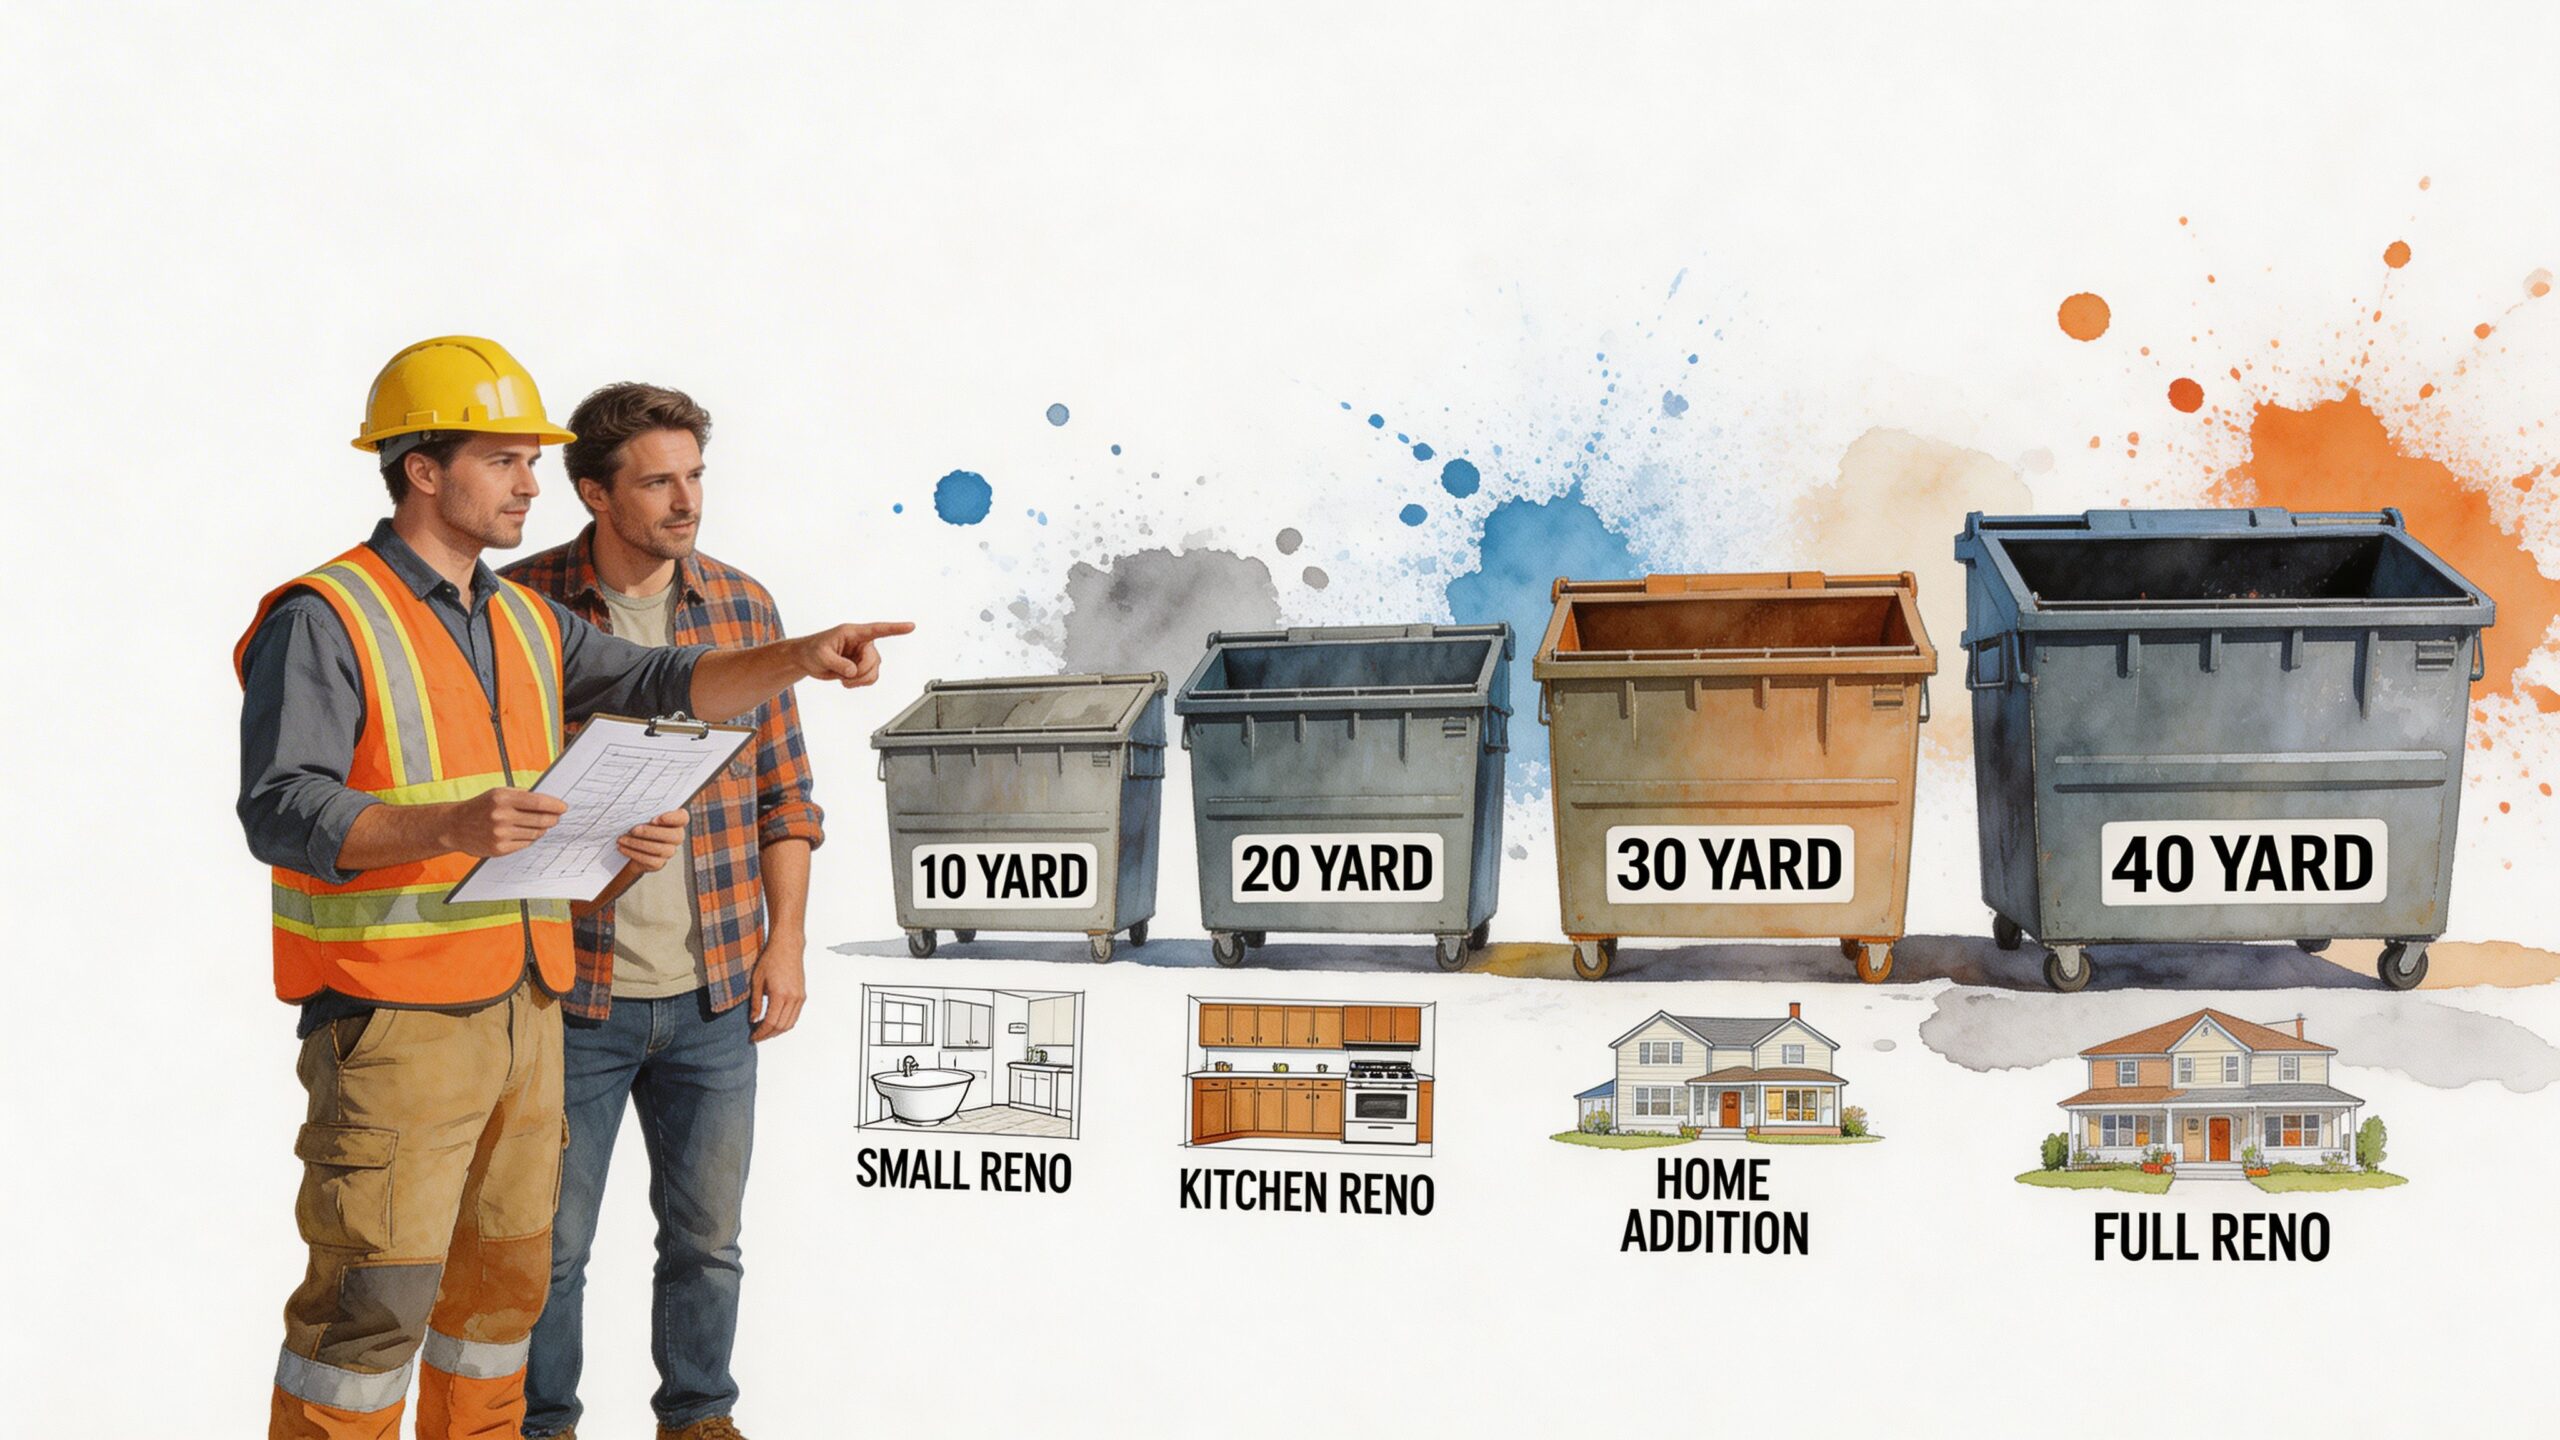
Match the dumpster to the waste stream
For small interior remodels, a 10-yard container is the right place to start. It’s easier to place, easier to load, and less likely to waste space on a tight site. If the debris is dense, smaller is often smarter anyway because weight becomes the limiting factor before volume does.
For medium renovations, a 20-yard gives the crew enough breathing room. It handles mixed debris better than a small box and reduces the chance that you’ll need an early swap just as the demolition pace picks up.
For new construction or major tear-outs, larger containers make more sense when the debris is bulky and generated continuously. In broad framing, sheathing, packaging, and general construction cleanup, more volume reduces interruptions. That’s why new construction often leans on 30 to 40 yard units with swap service rather than trying to squeeze everything into smaller bins.
Old buildings change the math
Old buildings change the math. Standard online calculators prove inadequate here.
Pre-1970s home renovations can generate nearly triple the waste volume of similar-sized modern projects because older jobs include denser materials like plaster, concrete, and heavier fixtures (older-building waste case examples). If you’ve ever opened a wall expecting light demo and found thick plaster assemblies and patched-over layers, you already know the problem.
That’s why a project manager should look at three things before picking a dumpster:
- Building age: Older structures often hide denser, bulkier tear-out.
- Material mix: Drywall, wood, and packaging behave differently from plaster, masonry, or slab removal.
- Debris timing: Some jobs produce waste steadily. Others create one sharp surge during demo.
On older renovations, size up your thinking before you size up the dumpster.
A practical way to choose
Use a simple field approach instead of trying to make the estimate look scientific.
Small scope, dense debris
Think bathroom remodels, partial flooring demo, patch concrete, and targeted cleanouts. Start with a smaller roll-off, then confirm weight rules with the hauler.
Medium scope, mixed debris
Think kitchen gut, roofing, multiple-room renovation, or finish tear-out. A 20-yard earns its keep in these situations because it balances footprint and capacity.
Large scope, bulky debris
Think major commercial cleanout, large demolition, or broad new-build cleanup. Bigger boxes reduce haul interruptions if the material is not overly dense.
A quick visual walkthrough also helps. Count the obvious waste first, then add what’s hidden behind walls, under finishes, or inside framing cavities. The hidden waste is what blows up the original dumpster plan.
A short field video can help teams explain this to clients and junior PMs before ordering:
Understanding Dumpster Weight Limits and Materials
The load that blows up a dumpster plan usually does not look dramatic at first. A crew starts tossing demo into a box, the container is only half full, and everyone assumes there is plenty of room left. Then the driver arrives, sees concrete chunks buried under light debris, and the pickup stalls before it leaves the site.
That mistake costs real money. Weight limits are tied to the container, the truck, and legal road limits. Heavy materials such as concrete, brick, dirt, asphalt, mortar, and wet debris can hit the allowable load long before the dumpster looks full. The National Waste & Recycling Association explains that overweight containers create safety and transport compliance problems for haulers and job sites alike (overweight container safety guidance).
Heavy debris changes the sizing decision
For dense material, smaller is usually the safer call.
A 10-yard box often makes more sense for concrete or masonry because it helps control load weight before the crew gets carried away with open space. A larger container can tempt the site team to keep loading because the walls are higher. That is how a box that looked efficient at noon turns into a reload, a rejected pickup, or an extra haul ticket by the end of the day.
I have seen this on slab demo and footing work more than once. The problem was not ordering too little volume. The problem was giving heavy debris too much room.
Material type should drive the rental conversation
Do not order by yardage alone. Tell the hauler exactly what the crew is loading and whether that material will stay dry, get mixed, or change during the job.
Use this field breakdown:
- Concrete and masonry: Dense, predictable, and better isolated in smaller containers.
- Dirt and asphalt: Heavy fast. These loads need tight control.
- Mixed demolition debris: Weight varies a lot depending on how much plaster, tile, roofing, or masonry ends up in the box.
- Wood, metal studs, insulation, and packaging: Bulkier, usually lighter, and often a better fit for larger dumpsters.
- Wet waste: Rain changes the load. Drywall, carpet, and general debris get heavier quickly.
Mixed loading is where PMs get burned. The crew fills the box with light tear-out, sees extra capacity, then drops broken concrete, mortar pans, or wet sand on top. Now the dumpster is overloaded and no one notices until pickup.
For heavy material, size to the legal haul weight first. Treat volume as the second check.
Separate general debris from concrete-related waste
This is also where standard dumpster advice falls short on concrete jobs. A roll-off is for debris. It is not a substitute for washout containment.
Concrete washout carries slurry, high-pH water, and fines that should never be dumped into a general construction dumpster. Once crews start washing chutes, tools, or pump parts into the wrong container, the site creates a different problem entirely. You are no longer just dealing with dumpster weight. You are dealing with contamination, cleanup risk, and compliance exposure.
Keep the systems separate. Put broken concrete and hardened chunks in the right dumpster. Put washout water and slurry in a designated containment setup.
What works on site
The cleanest setups use a few simple rules. Keep dense debris in its own container. Cap heavy loads before the box looks full. Ask the hauler about restricted materials before delivery, not after the crew has loaded the container. Check the dumpster after rain if the job has absorbent debris inside.
What fails is the catch-all approach. One box for everything sounds efficient on paper, but on active sites it usually creates re-sorting, extra haul charges, pickup delays, and arguments at the gate. Good dumpster planning is really load planning. If the material is heavy or concrete-related, control it early and the rest of the job stays easier to manage.
Planning Your Site Logistics and Permitting
A dumpster can be the right size on paper and still cause a bad day on site.
The usual failure is not sizing. It is placement. The hauler arrives, the approach is blocked, the ground is too soft, or the truck cannot line up without cutting across active work. Then the crew stops what it is doing to solve a problem that should have been handled the day before.
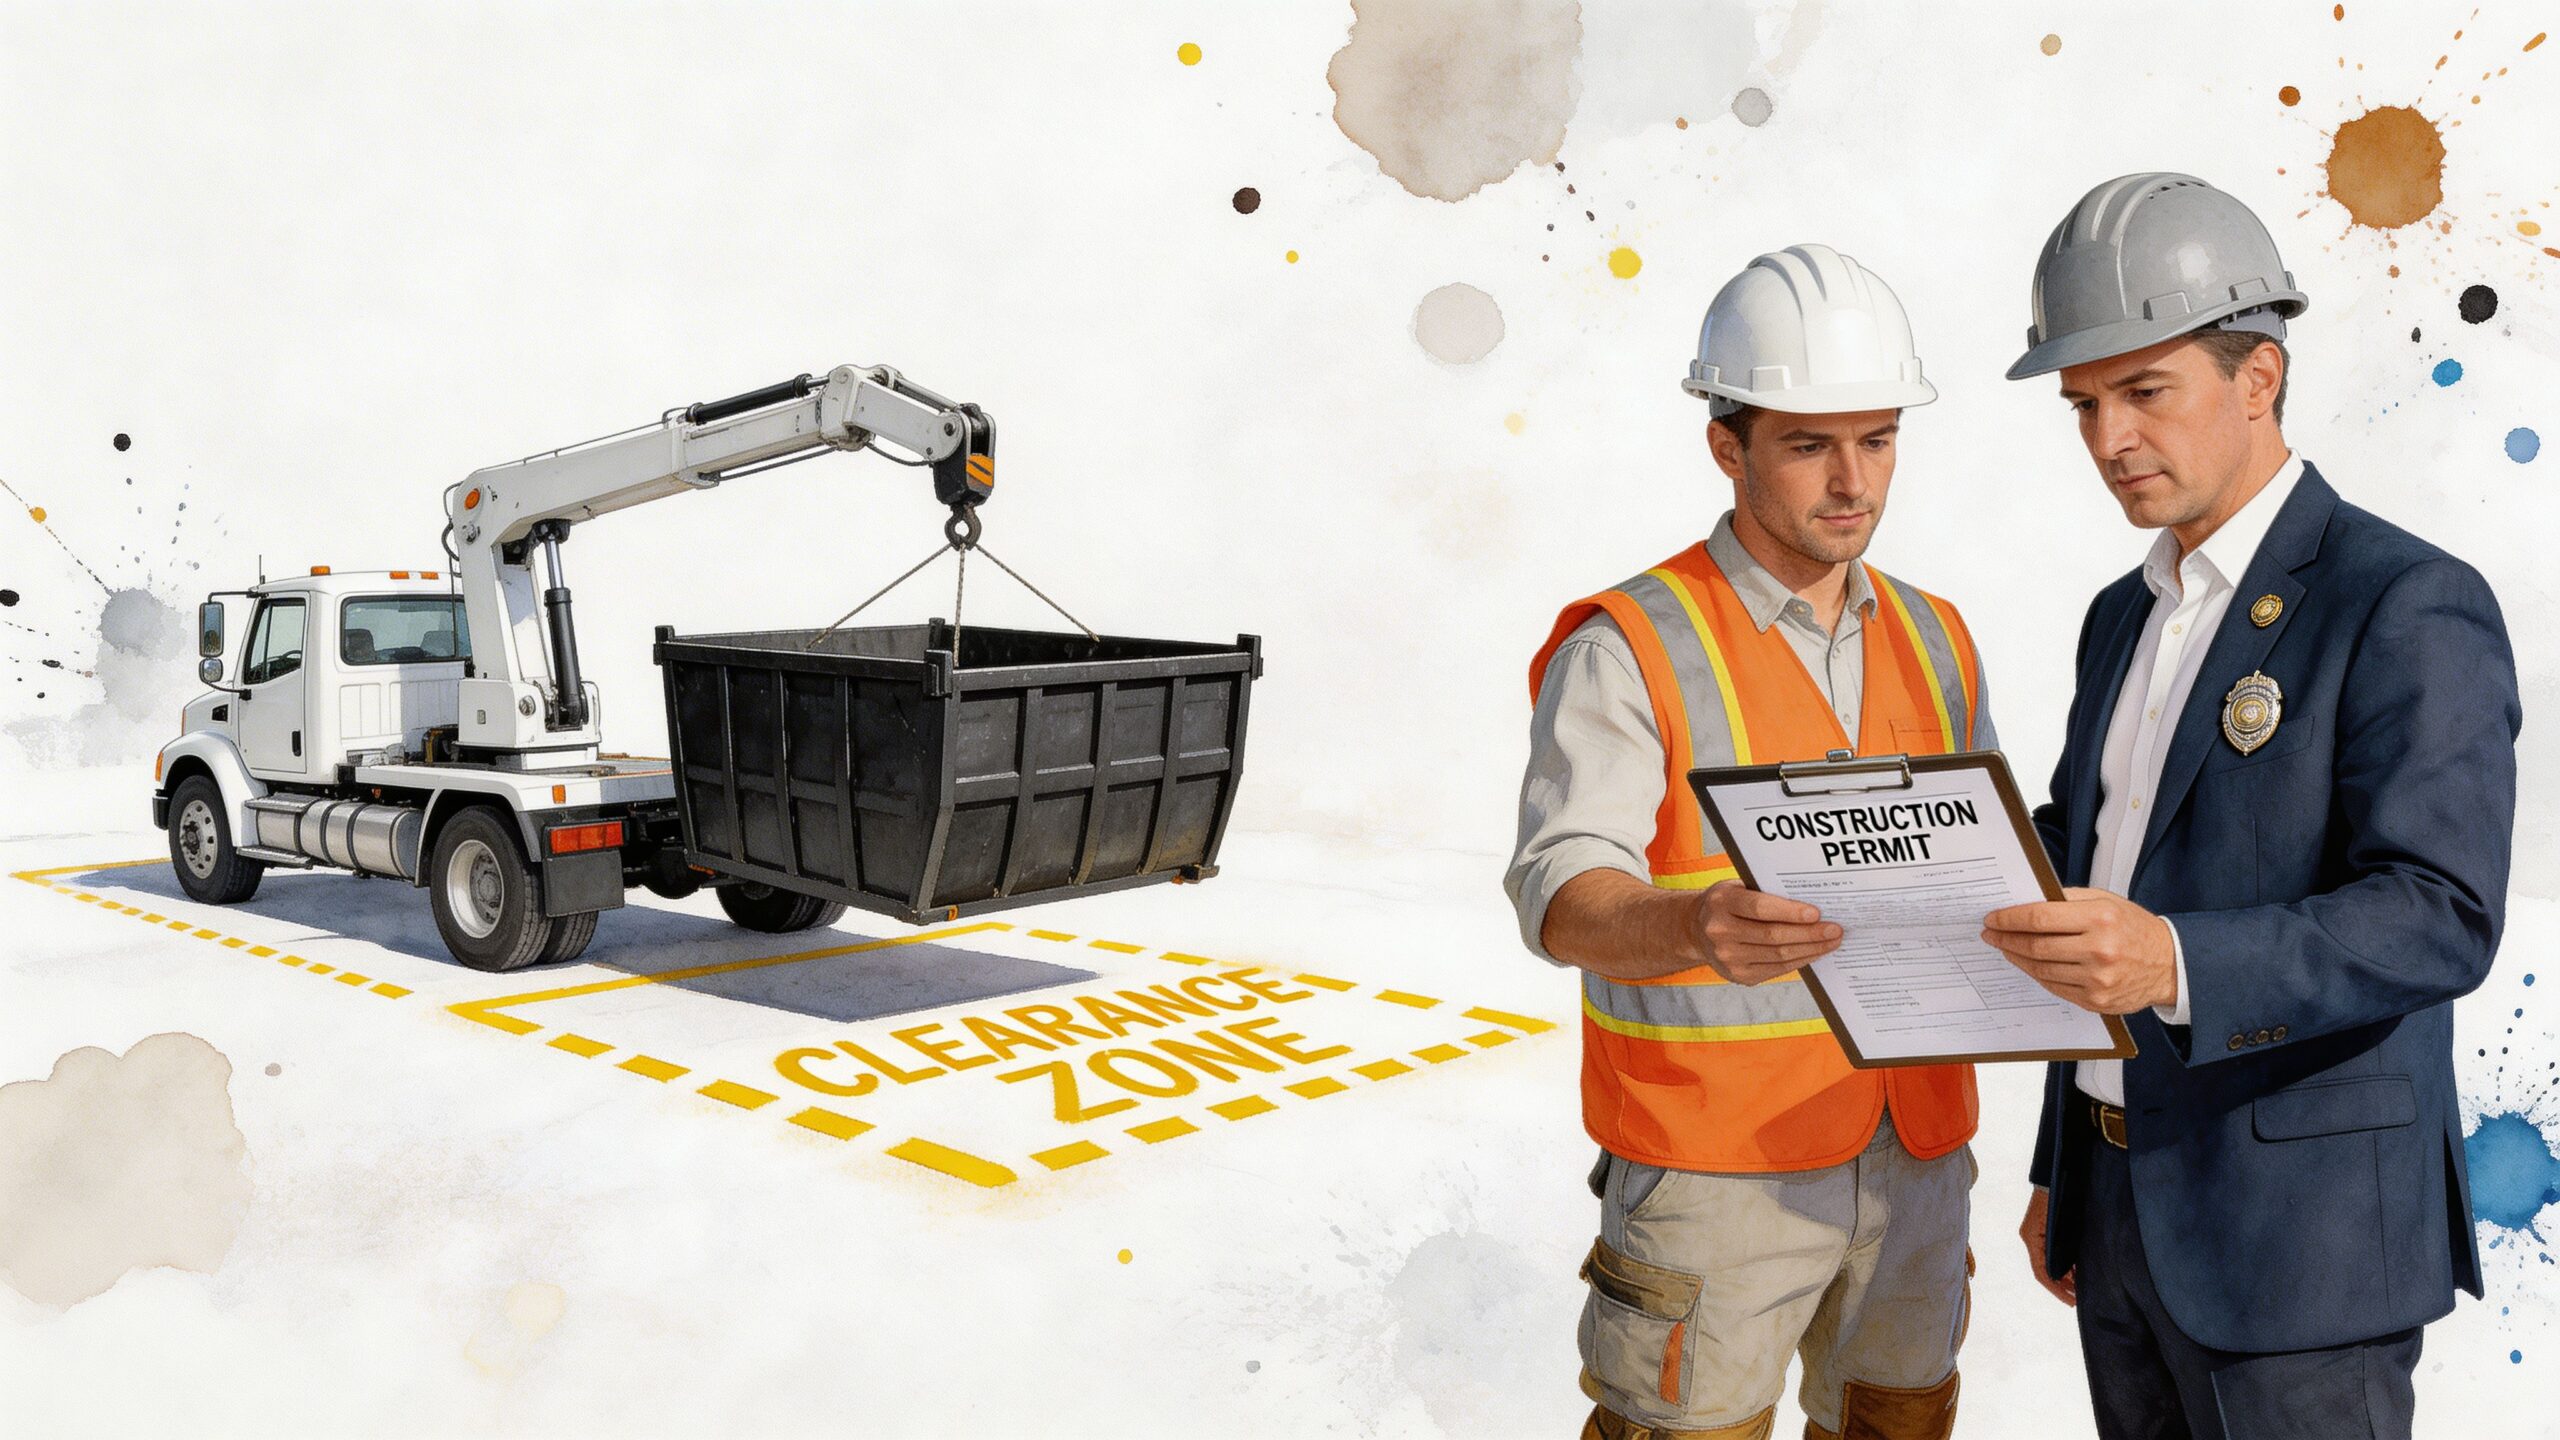
Check access before you schedule delivery
Measure the approach path, the set-down area, and the exit path before you call for delivery. Roll-off trucks need straight-line working room, clearance overhead, and enough space to raise the container safely during drop-off and pickup. The National Waste & Recycling Association stresses the need to keep container areas accessible and free of obstructions so service can happen safely and on schedule (waste container safety and access guidance).
Field conditions decide whether a location works. A spot may look open until a framing package shows up, a lift gets parked there, or rain softens the shoulder. For concrete jobs, check one more conflict point early. Leave room for mixer access and for a separate washout containment area so crews do not start improvising after the pour.
Use this field check before confirming the drop:
- Clear the truck path: Move parked vehicles, pallets, gang boxes, and stored material.
- Check overhead clearance: Watch power lines, scaffolding, tree limbs, and temporary lighting.
- Inspect the bearing surface: Soft subgrade, fresh asphalt, pavers, and broken pavement can fail under a loaded container.
- Protect finished surfaces: Use boards or other protection if the dumpster must sit on pavement you cannot afford to damage.
- Keep concrete operations separate: Do not place the dumpster where it crowds pump setup, chute washdown activity, or the designated washout containment area.
Placement affects daily production
Set the dumpster where labor can reach it without cutting through your main traffic routes.
That usually means close to the work, but not in the path of deliveries, forklifts, concrete trucks, or emergency access. If crews have to drag debris around stored rebar, across a pump hose path, or through material staging, disposal starts taking twice as long as it should. Small inefficiencies stack up fast over a week.
Good placement also protects swap service. A full container should be exchanged without shutting down half the site or forcing a last-minute cleanup just so the truck can get in.
Don’t assume street placement is automatic
Private property is usually simpler. Street, alley, and sidewalk placement can trigger permits, time limits, cones, reflective markings, or other municipal conditions.
Check local requirements before the first delivery, not after the box is full. Miss that step and the job can end up paying for relocation, dealing with a citation, or waiting on a delayed swap while debris piles up. On concrete work, a permit mistake can create a second problem if the dumpster location pushes washout activity into the wrong area.
The practical rule is straightforward. Confirm access, confirm the ground can carry the load, and confirm you have legal use of the space. That is how dumpster planning stays tied to production instead of turning into rework.
The Missing Piece for Concrete Jobs Washout Containment
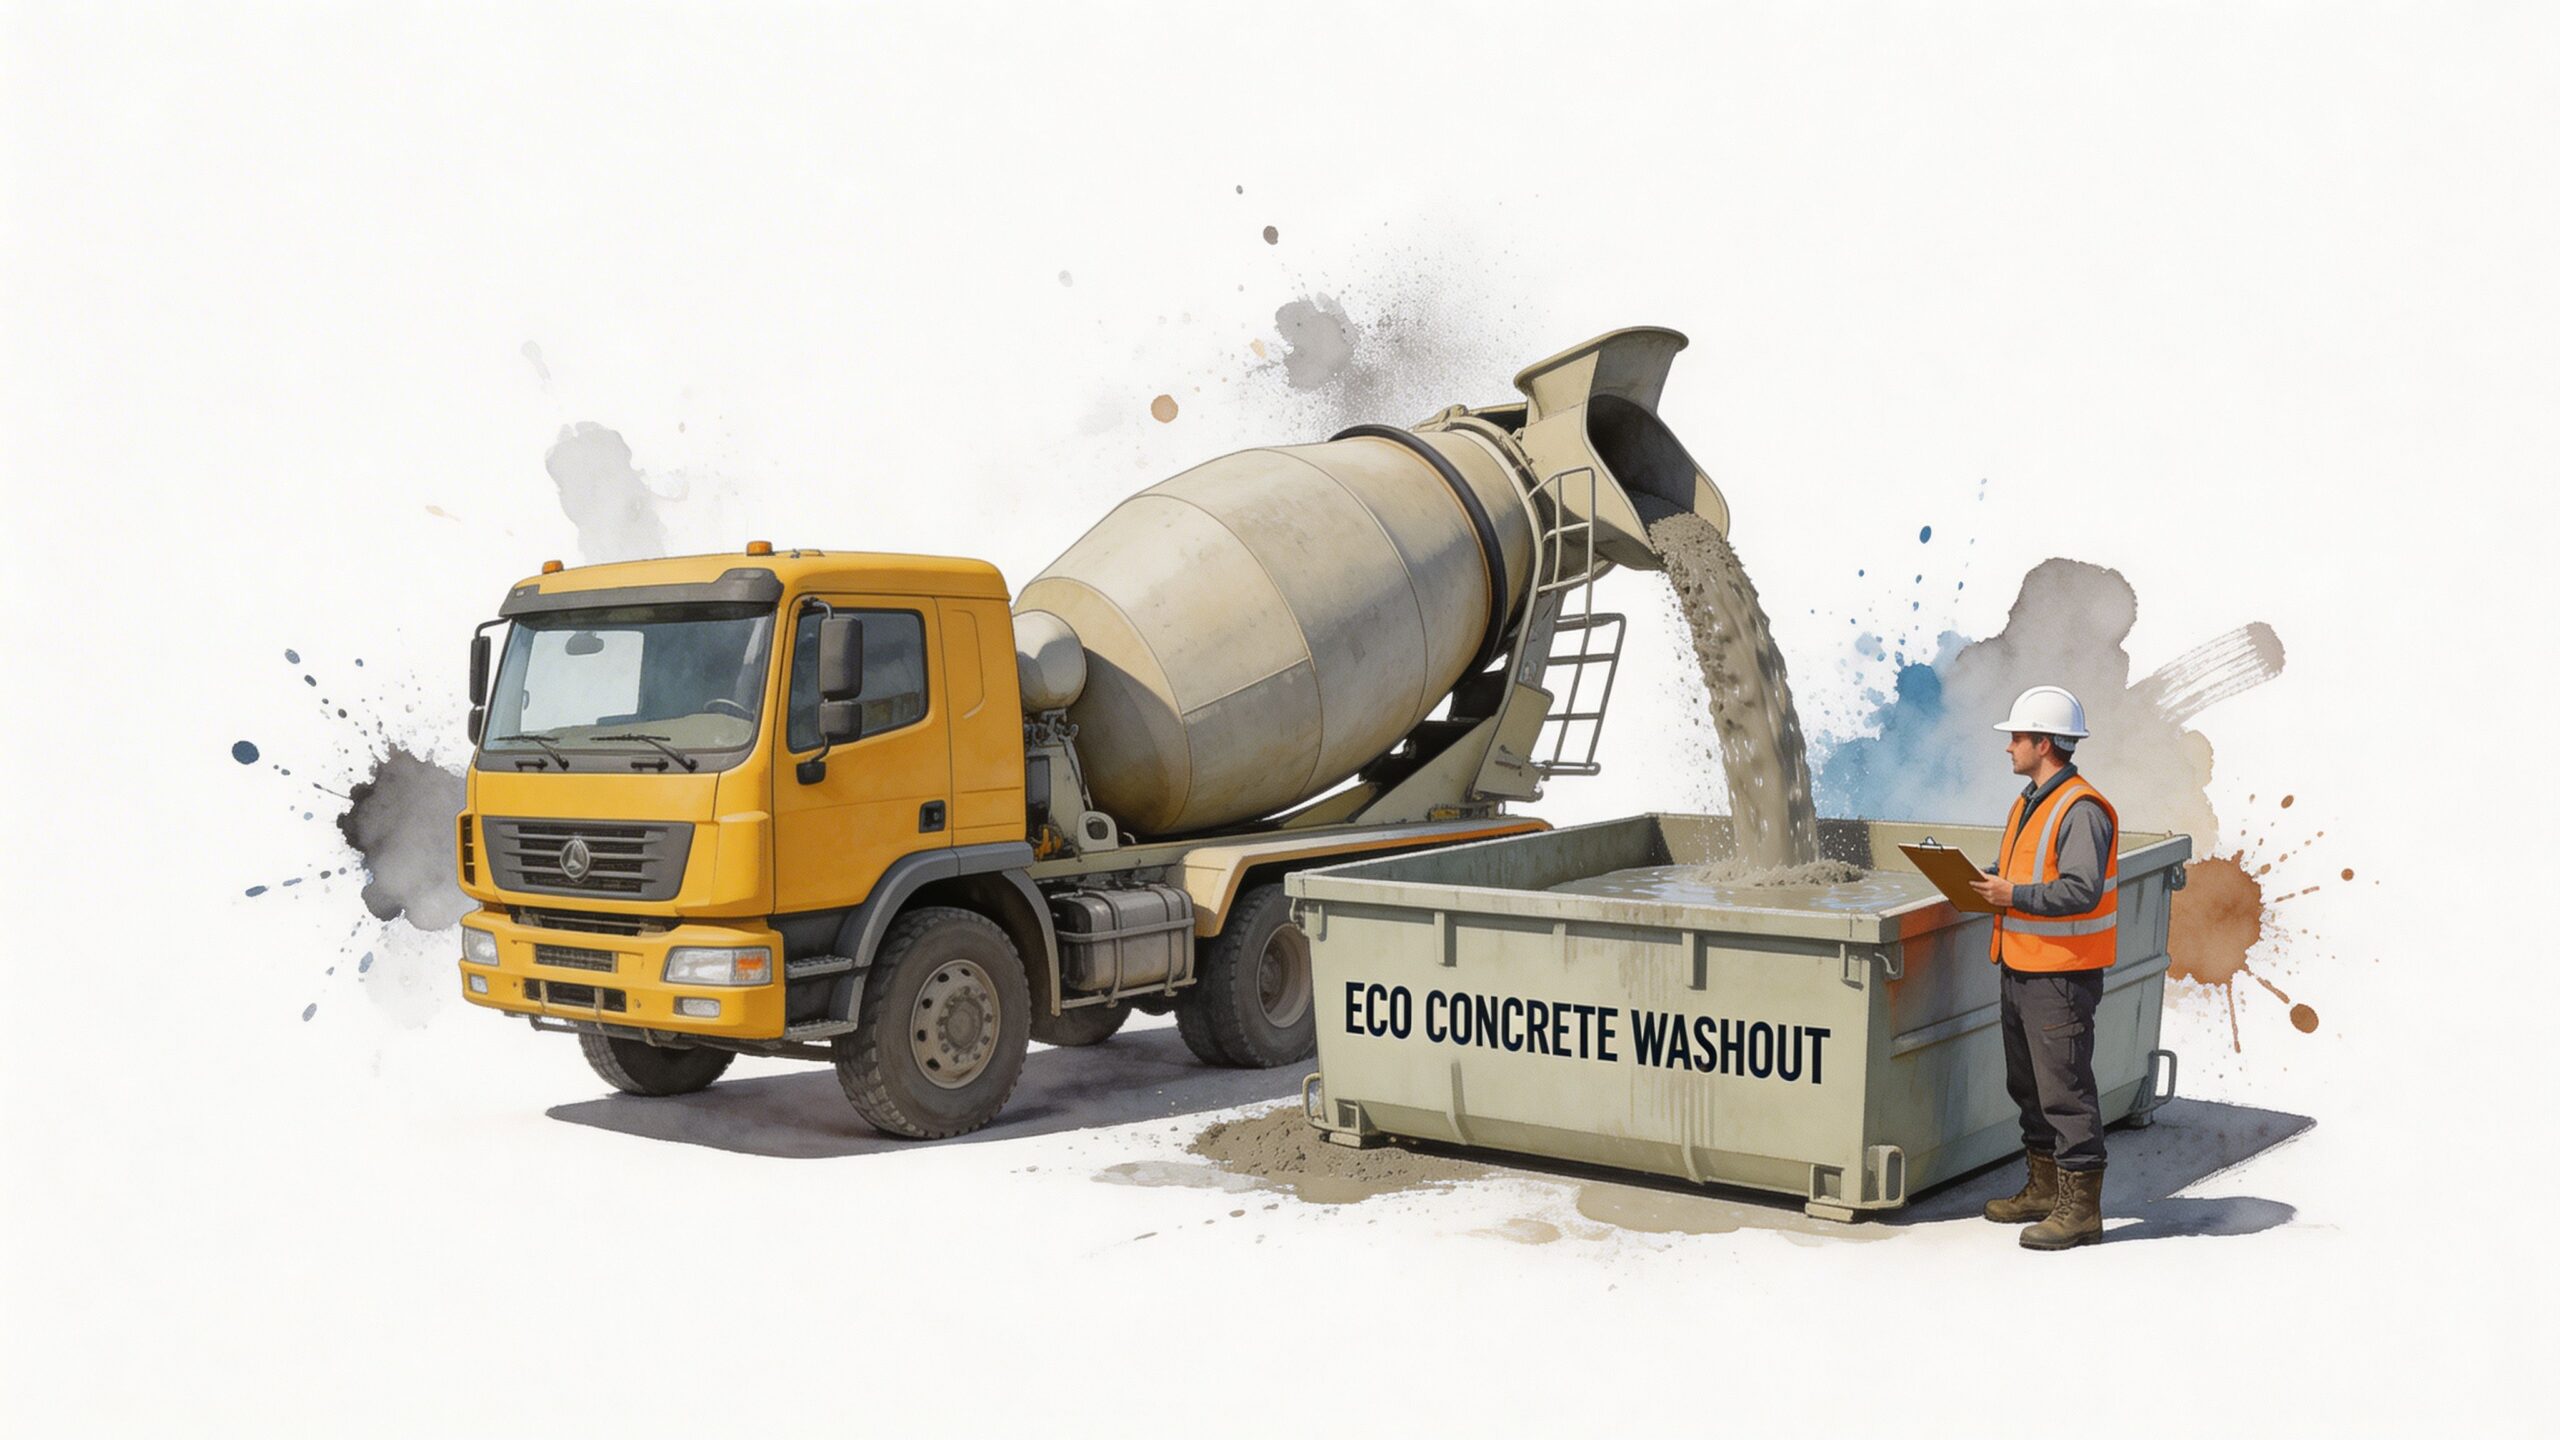
A roll-off dumpster handles general debris. It does not solve concrete washout.
That distinction gets missed all the time on mixed-use jobs. The team plans for broken pallets, form lumber, reinforcing packaging, and general construction trash, but no one puts a separate plan in place for slurry, rinse water, and leftover concrete washout. Then the project discovers the problem after the pour, when the material has to go somewhere immediately.
Why a standard dumpster isn’t enough
Standard dumpster guidance focuses on demolition, renovation, roofing, and cleanup waste. It seldom explains the separate containment requirement for concrete washout under SWPPP expectations. That gap matters because concrete washout cannot be deposited in a standard roll-off dumpster, and failing to plan for dedicated containment pushes contractors into compliance trouble after the fact (washout containment gap in standard dumpster guidance).
Washout is a different category of site waste. It’s wet, messy, and regulated differently from ordinary solid debris. Even if the same project needs a dumpster, that doesn’t mean the dumpster can serve double duty for washout water and slurry.
Think in paired systems, not single containers
On concrete work, waste planning should happen as a pair:
- Roll-off dumpster for general debris such as packaging, broken form material, and non-washout construction waste.
- Dedicated sealed washout containment for slurry, rinseout, and sediment-laden water.
That paired approach avoids one of the most common field mistakes. Crews assume the general dumpster order checked the box for waste management, when in reality the concrete scope created a second containment requirement from day one.
Concrete work creates two waste streams. Plan for both before the first truck arrives.
What practical planning looks like
Before concrete placement starts, answer these questions:
Where will the crew wash out tools and chutes?
If nobody knows, the site doesn’t have a real plan.
Who owns maintenance of the containment area?
Responsibility should be clear. Otherwise the container gets ignored until it becomes a problem.
How close is the washout to the active pour without interfering with traffic?
Too far away and crews improvise. Too close and trucks and finishers start tripping over each other.
How does the washout setup interact with the general dumpster?
They should support each other, not compete for the same staging space.
Standard sizing guides leave out this piece. For concrete jobs, the right size of construction dumpsters is only half the answer. The other half is recognizing that the dumpster handles one waste stream, and washout containment handles another.
A Strategic Approach to Construction Waste Management
The best waste plans are boring in the right way. They don’t create drama, surprise costs, or last-minute cleanup decisions.
Start with volume. Match the dumpster to the scope and to how the debris will be generated. Then adjust for material density, especially on older buildings and heavy tear-out work. After that, check weight limits, because a container that looks half full can still be overloaded.
Site layout comes next. Plan the drop location, truck access, swap path, and permit requirements before delivery day. That avoids the usual scramble when the driver is on site and the area isn’t ready.
For concrete work, add the missing component early. Don’t treat washout like an afterthought. It needs its own containment plan from the start.
That’s the practical framework:
- Size for the project
- Adjust for what the material really is
- Respect weight
- Protect site logistics
- Separate washout from general debris
Do that consistently, and waste management stops being a recurring problem. It becomes part of how the job stays clean, compliant, and on schedule.
If your project includes concrete work, Reborn Rentals helps crews add the washout containment piece that standard dumpster planning often misses. Their rental lineup is built around dedicated concrete washout solutions, with clear daily pricing, straightforward scheduling, and practical support for delivery logistics so your site can manage debris and slurry as two separate systems instead of one expensive problem.